This month’s ‘What’s Baking’ challenge theme was a good one–A Small Dessert for 1 or 2. It was hosted by Eva from Eva Bakes and a great idea. Seeing as it’s only Husband and I (no kids thanks-just the dog), I often find that recipes make just way.too.much. for just the 2 of us.
This strudel is delicious. The cranberries are so tart and the Meyer lemon adds a bit of sweetness. It can’t get easier than just unrolling the puff pastry either.
This is the perfect strudel to make in the dead of winter as both blood oranges and Meyer lemons are in season. Feel free to use more or less of the Meyer lemon, blood orange and/or regular orange juice.
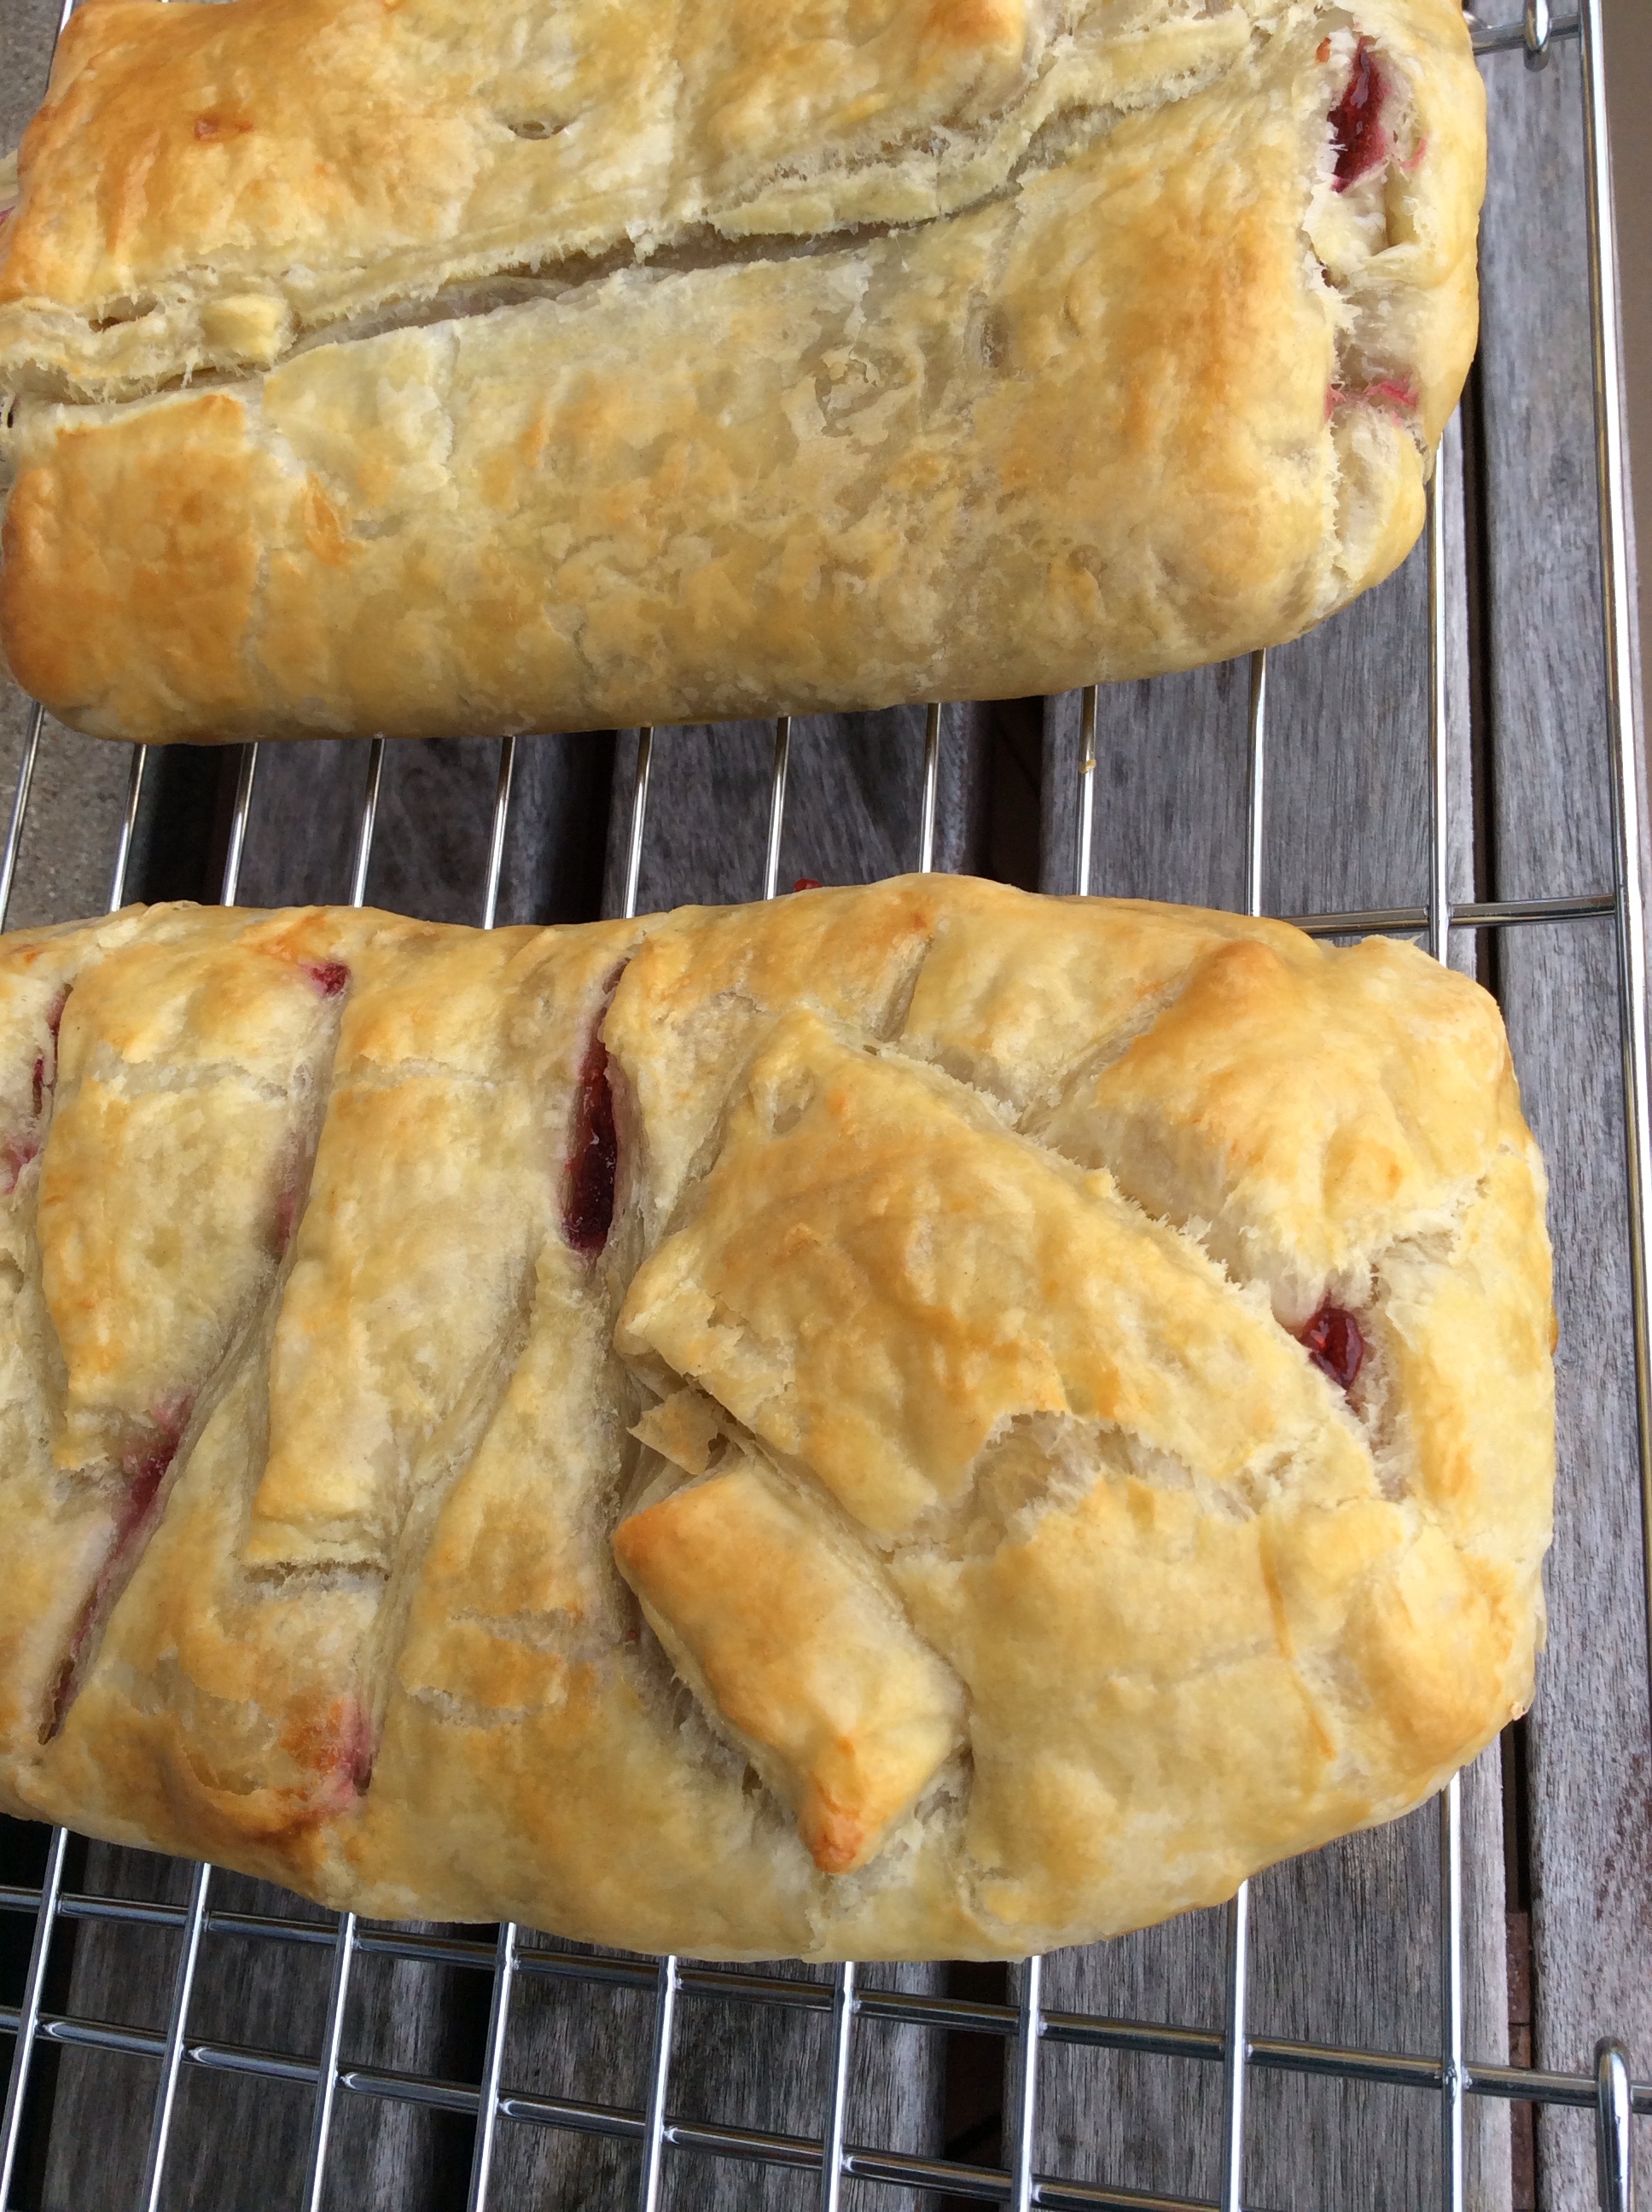
Cranberry & Meyer Lemon Strudel
Ingredients:
- 12 ozs frozen whole cranberries, thawed.
- 1 cup granulated sugar
- 1 tbsp corn starch
- 1 tbsp Meyer lemon zest
- 1 tbsp blood orange juice
- 3 tbsp orange juice
- 1 package Pepperidge Farm frozen Puff Pastry (package contains 2 sheets)
- 1 egg, lightly beaten
- 1 tbsp water
- 1/2 cup confectioners sugar
- 2-3 tbsp orange juice
Instructions:
- Set a large sauce pan over medium heat. Add the sugar, zest, corn starch and juices and stir to combine and dissolve. Add cranberries, stir and bring to a boil and continue cooking for 10-15 minutes, stirring constantly. The mix will thicken up considerably and the cranberries will burst.
- Remove the pan from the heat and put in the fridge for 2 hours.
- While the cranberry mix is cooling thaw the pastry as to the package instructions for countertop.
- Preheat oven to 375.
- Line a baking sheet with parchment paper.
- Lay one puff pastry sheet on one half of the baking sheet. Spread half of the cranberry mix down the middle section of the pastry, fold the left and right over the center. Pinch the dough at each end together to make a seal. Using a small sharp knife cut a few holes gently into the top layer of the pastry. Reapeat with the remaing pastry dough.
- Mix the egg and water together and, using a pastry brush, gently brush the egg wash on top of the pastry.
- Bake for 30-40 minutes.
- Allow to cool for 15 minutes on the baking sheet then transfer to wire racks to cool.
- Mix the confectioners sugar and orange juice together and, when the strudels are fully cooled, drizzle over the tops of each.
- Slice and serve.

Note: this makes 2 strudels. To make only 1 cut all ingredients in half.
Inspired by Easy Cranberry Strudel found on eatathomecooks.com
Check out the other great recipes for this month’s theme here.