Blueberry Lemon Curd Cake

I feel like I’ve had a crazy case of writers block lately. I have so many posts to write and my mind is just blank…..

Blueberries. Little spheres of yummy happiness. I’ve loved them all of my nearly 40 years on this planet. They’re so delicious and they’re healthy to boot. What’s not to love?

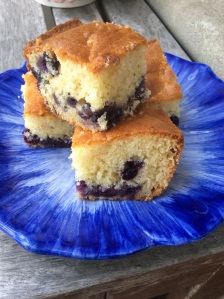
This recipe is on the healthier side of cake I guess you could say due to the yogurt-but don’t be fooled. It’s a deeeeelicious cake. It’s adapted from recipe I found digging through the endless offerings on the interwebs. I made changes that I think moved it along for the better. Also it’s big-it’s a 9×13 baking dish size which is great-everyone gets a piece.

image

Blueberry Lemon  Curd Cake

Ingredients:

  • 3 cups self-rising flour
  • 1/2 tsp baking soda
  • 1/2 cup extra virgin olive oil
  • 1/2 cup canola oil
  • 1&1/2 cups granulated sugar
  • 2 large eggs at room temperature
  • 1 cup plain greek yogurt at room temperature
  • 2 tbsp. lemon curd
  • 2 cups fresh blueberries

Instructions:

  1. Preheat oven to 425 and make sure the rack is in the middle.
  2. Spray a 9×13 glass baking dish with baking spray and set aside.
  3. In the bowl of a mixer fitted with the paddle attachment add the oil, eggs and sugar. Mix on medium until it’s smooth, scraping the sides as needed.
  4. Add the yogurt and lemon curd and continue to mix, scraping again, until smooth.
  5. In a separate bowl whisk the flour and baking soda together.
  6. Gently fold the flour into the wet ingredients.
  7. Add the berries and fold very gently until mixed in.
  8. Pour the batter evenly into the pan and spread it evenly with a spatula.
  9. Bake for 5 minutes then lower the heat to 350 and bake for 20-25 more minutes or until a toothpick inserted into the center comes out clean.
  10. Remove. Allow to cool and then cut and serve.
  11. Will keep for a few days in an airtight container.

image

This cake is this installation of What’s Baking!!! The theme for this time around is ‘baking with fresh fruit’.

image

Adapted from http://www.letthebakingbeginblog.com
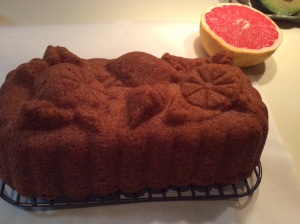
Ruby Red Grapefruit, Meyer Lemon and Olive Oil Cake

I was so glad to see the Meyer lemons back in the store a few weeks ago. I bought a few of them with the intent of finding something to bake/cook/mix. The season is so short and I didn’t want to wait.

Coincidentally, the next day, I spotted a gorgeous cake on Cheese Curd in Paradise. A grapefruit and olive oil cake.  I saw it and thought “well why not? Grapefruit and Meyer lemons are delicious together! ” I also had a grapefruit in my fridge to use up. So the recipe below was hatched. It’s a lovely lightly flavored, moist cake that is very easy to make. No mixer needed-just a few bowls and a spoon.

Any left over glaze is perfect for dipping strawberries into also!

image

Ruby Red Grapefruit, Meyer Lemon and Olive Oil Cake

Ingredients (Cake):

  • Non-stick baking spray
  • 1 & 1/2 cups AP flour
  • 2 tbsp ruby red grapefruit zest
  • 1 tbsp Meyer lemon zest
  • 1 cup granulated sugar
  • 1/2 cup very good quality olive oil
  • 2 large eggs, at room temperature
  • 1 tsp baking powder
  • 1/4 tsp baking soda
  • 2 tsp table salt
  • 1 tbsp ruby red grapefruit juice (freshly squeezed)
  • 1 tbsp Meyer lemon juice (freshly squeezed)
  • 1/3 cup plain non-fat Greek yogurt

Syrup

  • 2 tbsp granulated sugar
  • 1/3 cup ruby red grapefruit juice (freshly squeezed)

Glaze

  • 1 cup confectioners sugar
  • 1 tbsp ruby red grapefruit juice (freshly squeezed)
  • 1 tbsp Meyer lemon juice (freshly squeezed)

Instructions:

  1. Pre-heat the oven to 350 and prepare a 9×5 inch loaf pan.
  2. Place the sugar and zest in a large bowl and smush it through your fingers until it gets slightly pasty.
  3. To the sugar mixture add the oil, whisk to combine, then the eggs-one at a time, stir until evenly combined scraping the sides of the bowl as needed.
  4. In a smaller bowl combine the flour, baking powder, baking soda and salt. Whisk to evenly combine.
  5. In a small bowl mix the juices and yogurt and whisk until evenly combined.
  6. Add the flour and buttermilk mixtures to the sugar mixture-alternating but beginning and ending with the flour. Stirring to combine in between each addition. Do not over mix.
  7. Pour the batter into the prepared pan and smooth it out on the top. Give the pan a few light taps on the counter to get out any air bubbles.
  8. Bake for 40-45 minutes or until a toothpick inserted into the middle comes out clean.
  9. While the cake is baking make the syrup. Place the ingredients into a small sauce pan, cook over medium heat until the sugar dissolves. Stir it from time to time. Set it aside.
  10. When the cake is done let it cool in the pan for 10 minutes. While the cake is cooling place a cooling rack over a large piece of parchment paper or foil. Place the cooling rack on the top of the cake and carefully turn it upside down to release the cake from the pan onto the rack. Place it over the foil or parchment and, using a skewer, poke holes about 2 inches into the cake. Slowly pour the syrup evenly over the top of the cake. Leave the cake to cool completely.
  11. Make the glaze by combining all of the ingredients above in a small bowl and whisk to combine and form a smooth even mixture. Drizzle the glaze over the cake slowly and evenly. Let it set and serve.

image

Adapted from Smitten Kitchen via Cheese Curd in Paradise.

Gingerbread Cookies

I’m not sure why but I’d never made gingerbread before. The recipes always scared me a bit. Maybe it was the molasses. I do love it though–such a not-sweet cookie and so ‘holiday’.

I was so glad (and somewhat terrified) when the What’s Baking group theme was revealed-GINGERBREAD!

And you know what? I was afraid for no reason. They were so easy to make! Such a small ingredient list, a simple procedure.  I’ll admit the first batch that I cut into man shapes ended up looking like aliens-but I figured out that it was because I rolled the dough too thin and it got warm.  You need to keep your dough COLD. Really really cold. And keep it rolled to no thinner than 1/4 inch.

While the recipe stated to roll half of the dough at a time, I found using only 1/4 was much easier for me to keep the temperature right.

So have fun!! Fear not!!

I didn’t get to decorate my gingerbread cookies. Since I was serving them as part of the dessert for my Christmas Eve get together I decided to let everyone decorate their own-how fun it was!  Since I’m not the best with decorating cookies it saved me some crooked-decorating humiliation too.

image

Gingerbread Cookies

Ingredients:

  • 3/4 cup unsalted butter
  • 3/4 cup brown sugar, packed
  • 3/4 cup molasses (regular/original)
  • 1 tsp salt
  • 2 tsp ground cinnamon
  • 2 tsp ground ginger
  • 1/4 tsp allspice
  • 1 large egg
  • 1 tsp baking powder
  • 1/4 tsp baking soda
  • 3 & 1/2 cups unbleached AP flour (I used King Arthur brand)

image

Instructions:

  1. Melt the butter in a small sauce pan set over medium heat. Stir in the brown sugar, molasses, salt and spices.
  2. Pour the butter mixture into a large mixing bowl and set it aside to let it cool to lukewarm. Then beat in the egg.
  3. Whisk the baking powder and baking soda into the flour. Add the flour mixture to the butter mixture.
  4. Stir until completely combined. Don’t over-mix.
  5. Divide the dough into 4 even pieces and wrap each tightly in plastic wrap. Cool them in the refrigerator for at least an hour-but up to one day.
  6. Preheat the oven to 350. Line several baking sheets with parchment paper.
  7. When the dough has chilled sufficiently roll it to 1/4 inch thickness using parchment paper on the bottom and plastic wrap on top.
  8. Cut out shapes with cookie cutters and carefully transfer the shape to the prepared baking sheet. Reroll and cut the scraps or add to the batch in the fridge.
  9. Bake for 8-12 minutes or until firm. Mine took exactly 9 minutes as I like them a bit chewy.
  10. Let the cookies cool on the baking sheet for a minute or 2 then carefully (I use my fish spatula for this) transfer them to cooling racks.
  11. Repeat with the remaining dough.
  12. Once cooled completely you can decorate them. The cookies will keep for at least a week in an airtight container un-decorated.

I used moose, owl, snowflake and the typical gingerbread man cookie cutters. They came out great!!

image image


Here’s the ‘make your own’ set up. Some sprinkles, some frosting pens….

image


Adapted from King Arthur Flour’s recipe.

image

What’s Baking July/August Round-up!

I was excited to be the host of this edition of What’s Baking? for July/August. I enjoy this great group of ladies and always look forward to see the amazing dishes that they bake. This time was no exception!

image

I chose the theme “Bake your Heritage”.  The idea was to bake someting-sweet or savory-which is common to the/or a country in your heritage. The dishes did not disappoint!!

Joanna from Kosher Kitchen made some incredible looking Whole Wheat Cinnamon Raisin Bagels!

image

Eva from Eva Bakes made Taiwanese Pineapple Tarts which sounds like a beautifully unique fruity pastry.

image

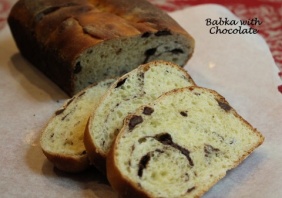
Liz from Books-n-cooks contributed an amazing looking Chocolate-Flecked Babka.

image

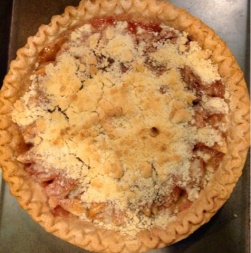
Ashley from Cheese Curd in Paradise baked a Dutch Apple Pie using her Great Grandmother’s recipe! Just in time for apple season!

image

Nichole from Cookaholic Wife created a delectable Irish Trifle which has quite a background story-you have to read the post.

image

Nicole from Cookies on Friday also submitted an English recipe as a nod to her husband’s nationality. Banbury Cakes-YUM!! her source was BBC Good Food Magazine which I love.

image

Jenni from Dough See Dough put together some amazing Char Siu Bao (Chinese BBQ Pork Buns) .  I have had these at a small diner at Elizabeth and Bayard Streets in Chinatown years ago and was SO excited to see a version that I can make at home.

image

Stephanie from Brownies and Blondies baked some Cassatedde to represent her Italian heritage-and her pastries look just like something you’d find in a bakery in Rome maybe, and enjoy with an espresso.

image

Jaida from Sweet Beginnings looked to the Irish part of her heritage and submitted Beef and Guinness Pie which I’ve already noted to make in the fall.  Husband thanks you, Jaida!!

image

Nicole from Seven Ate Nine went another direction and used the Midwest and the Southeast as her heritage and made a picnic and potluck pleasing Pineapple Upside Down Cake.

image

Catherine from Pursuing Domestic Goddess-ness submitted her spin on her Aunt’s banana bread recipeBanana Walnut Ginger Muffins which look really delicious.
image

And last, but not least, I made this delicious Caramel Croissant Pudding for the English part of my heriatge.

image

Thanks everyone for sharing amazing recipes with interesting backgrounds!!

Caramel Croissant Pudding

I was the host of  July/August’s What’s Baking group and I chose the theme of “Heritage Dish”–make a dish common from a/one country of your heritage.

Since I am part English I wanted to make a Pudding. I scoured cookbooks and the internet for the one. Then, on nigella.com, I found it. Caramel and Croissant Pudding?! REALLY? mmmmmm. It came out just as delicious as it sounded. It also took all of 10 minutes to put together to boot. 

What a genius way to use up day old or stale croissants-they go so fast. The super-buttery bread paired with a simple caramel with a hint of rum makes an amazing combination of flavors.  The texture is nice too as some of the croissants stick up and get a little crusty while it bakes. This recipe is genius.

image

Caramel Croissant Pudding

Ingredients

  • 2 day old croissants-mine were the standard large bakery size, ripped into inch-sized pieces
  • 1 cup granulated sugar
  • 2 tbsp water
  • 1/2 cup heavy cream
  • 1/2 cup unsweetened almond and coconut milk
  • 1 tbsp rum
  • 2 large eggs beaten

Instructions

  1. Preheat oven to 350F.
  2. Place the croissant pieces into a baking dish large enough to hold all of them tightly packed into an almost even layer.
  3. Put the sugar into a deep sauce pan, add the water and swirl to dissolve the sugar.
  4. Place the sauce pan over medium/high heat and let it bubble on, no stirring, until it’s a deep amber color-3ish to 5ish minutes.
  5. Turn the heat to low and add the cream, it will sputter so be careful, but whisk continuously while adding the  milk and rum. Keep stirring and make sure to dissolve any hard bits that form.
  6. Remove from heat, keep whisking, and add the eggs until all mixed and combined.
  7. Pour it over the croissants.
  8. Place the dish in the oven and bake for 20 minutes.

Good luck not eating it all in one sitting.

It could make 1, 2 or 6 servings depending on how greedy those who are eating it are.

image

Adapted from nigella.com

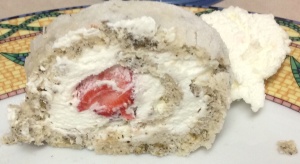
Strawberry & Earl Grey Roulade

I spotted this recipe in the June 2014 issue of Olive and was immediately intrigued. I LOVE earl grey tea so right away I thought it sounded delicious. Earl Grey tea has that calming bergamot flavor that I just adore. The cake is beautifully light and airy. Paired with beautiful sweet strawberries and fresh whipped cream? Winner. Since this month’s “What’sBaking” theme is ‘seasonal fruit’ it fit in perfectly.

This does take some time to prepare as the cake has to cool before it’s rolled, but the actual mixing, baking etc.. is generally pretty simple. Allow enough time to cool, roll then chill.

image

Earl Grey with Strawberry Roulade

Cake Ingredients:

  • 3 tbsp fresh lemon juice
  • 2 tbsp earl grey tea, loose leaves
  • 4 eggs, whites and yolks separated
  • 75g caster sugar, plus extra for sprinkling
  • 75g AP flour
  • 2 tbsp vegetable oil
  • 1/4 tsp orange extract (oil)

Filling ingredients:

  • 2 tbsp fresh lemon juice
  • 3 tbsp icing sugar (powdered or confectioners sugar)
  • 300 ml heavy whipping cream
  • 15-20 strawberries of similar size

Cake Instructions (use cake ingredients only):

  1. Pre-heat oven to 350. Line a 9×13 baking sheet with parchment paper and set it aside.
  2. Place 1 tbsp of tea into lemon juice and heat slowly until brewing. Do not allow it to boil. Allow a few minutes to brew, stirring occasionally. Strain lemon juice through a sieve pressing the tea leaves to extract all of the moisture. Discard strained tea leaves. Crush the remaining dry loose tea with a mortar and pestle or give it a whiz in a small food processor.
  3. In a large bowl beat the egg yolks with 25g of the sugar until pale and frothy. Then add the flour, oil, dry loose tea, tea infused lemon juice and orange extract.  Mix to evenly combine.
  4. With clean beaters in a large bowl bat the egg whites to soft peaks.  Add the remainder of the sugar and beat until thick and glossy. Gently fold the whites into the yolk mixture, 1/3 at a time, until any streaks disappear.
  5. Spread into the prepared baking sheet, smooth with a spatula, and bake for 13 minutes until slightly browned.
  6. Lay a large sheet of parchment on the work surface. Flip the cake onto it (I found using a fish spatula to help the cake and parchment separate was helpful in a few spots. Lay another sheet of parchment out, liberally dust it with sugar and flip the cake onto it. Leave it to cool on a baking rack.
  7. When cooled make the filling (using the Filling Ingredients above). Beat the cream, lemon juice and sugar together until very thick. Using a soft spatula spread a thin layer of the whipped cream onto the cake. At one end line up the strawberries curved side down so the cake will roll up around them. Carefully roll the edge of the cake over the strawberries, then continue to roll until all rolled up. Put one sheet of parchment around, make sure it’s rolled tight, and put in the refrigerator for at least an hour to set.
  8. When ready to serve, unroll parchment and gently slice down straight through the cake.
  9. Serve with additional whipped cream, berries etc..

Adapted from Olive Magazine, June 2014

image

Limoncello Chill

How is it possible that this past weekend was Memorial Day? Already? I remember last year Memorial Day weekend was cold and rainy. It was the opposite this year! Sunny and warm and lovely. And PERFECT for a frozen dessert at the end of the bbq.

This little frozen yummy is not too sweet, not too tart and just right in size. You can’t get easier to assemble either. Hope you add it to one of your menus for these warmer months-it’s delicious!!

image

Limoncello Chill

Ingredients:

  • 1/4 cup lemon curd
  • 4 tbsp limoncello
  • 1 & 1/2 cups frozen vanilla bean greek yogurt* divided
  • 3 lemon candy slices

*I used Healthy Choice brand-they come in 1/2 cup servings.

Instructions:

  1. Mix the limoncello and lemon curd together until fully blended. Set aside.
  2. 15 minuutes before serving remove the frozen yogurt from the freezer and allow it to thaw a bit. Stir to airate and combine.
  3. In each of 3 serving dishes or glasses: put a bit of the limoncello mix at the bottom. Add the frozen yogurt and then top with more lemon mixture.
  4. Top with the lemon candy.

Yield: 3 servings.

Casey loved licking the left overs out of the glass.

image

I adjusted Cooking Light’s recipe a lot here. I swapped frozen greek yogurt for ice cream and added more limoncello, omitted the cookies and added the candy. Better for you and more of a kick.

Lucky O’Cupcakes

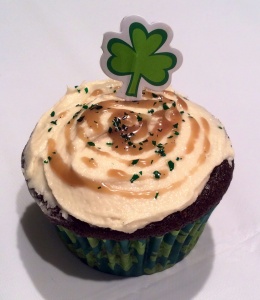
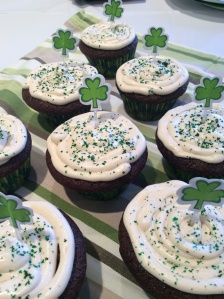
It’s time again for the What’s Baking monthly goodies!! This month’s theme was chosen by Colleen of the redheadbaker blog and she chose (so aptly) Bailey’s. Not a problem. I love the stuff. It’s also so convenient since I had planned on having a St. Patrick’s Day get together at my house the Saturday before the lucky little day so a dessert made with Bailey’s would be perfect.

So I thought. And thought. And thought. And thought about how I could incorporate it into something yummy but a bit different. I determined that I didn’t want to do a Guinness cupcake (no offense to Guinness-you’re my favorite beer) but everyone does that. So I thought ‘what do I like with my Bailey’s’? Coffee! And chocolate! PERFECT! So there was the cake flavor. But then the frosting. Bailey’s is pretty heavy stuff so I decided on a buttercream but I made it nice and light by also incorporating heavy cream.  Yummy. Then I thought back to many Christmas celebrations at my In-laws and remembered that my Husband’s Grandmother used to make Buttery Nipple shots-Bailey’s and Butterscotch Schnapps. There was the bit of goodness that would tie this all together. Throw on a bit of edible green glitter and it’s perfect.

Not only was this a super tasty, multi-tastyness treat-it was delicate. The cake is light and airy, the frosting is more along the whipped cream line than thick buttercream.  The butterscotch drizzle ties it all together. The best part for me-they’re not overly sweet-they’re just right.  They are a joy to eat. You feel just lucky to have one in your hand.

And voila! A masterpiece is born (it took me 6 tries to get that butterscotch to swirl). This is an original recipe.

image

Lucky O’Cupcakes

Ingredients:

For the cake:

  • 2 & 1/2 cups AP flour
  • 1 & 1/4 cups unsweetened cocoa powder (I used Hershey’s)
  • 2 & 1/2 cups granulated sugar
  • 2 & 1/2 tsp baking soda
  • 1 & 1/4 tsp baking powder
  • 1 tsp salt
  • 2 large eggs
  • 1 yolk from a large egg
  • 1 cup whole milk
  • 1/4 cup heavy cream
  • 2/3 cup vegetable oil
  • 1 tsp vanilla extract
  • 1 cup strongly brewed coffee
  • 1/4 tsp coffee extract

For the Bailey’s Frosting:

  • 3 & 1/2 cups confectioners sugar
  • 1 & 1/2 sticks unsalted butter, at room temperature
  • 3 tbsp Bailey’s
  • 1/4 cup heavy cream
  • 3 tbsp vanilla extract

For the Butterscotch drizzle:

  • 1/2 cup unsalted butter
  • 1 cup light brown sugar (packed)
  • 1 cup heavy cream
  • 3-6 tbsp vanilla extract
  • 1 vanilla pod, seeds scraped out and set aside
  • 1-3 tsp flaky fleur de sel sea salt

Instructions:

For the cake:

  1. Preheat oven to 350F. Prepare cupcake tins with paper liners (about 30). Set aside.
  2. In the bowl of  your stand mixer add the flour, cocoa, sugar, baking soda, baking powder and salt. Using the whisk attachment give it a minute or 2 on low speed to mix everything thoroughly.
  3. Now add the eggs, yolk, milk, cream, vanilla, coffee and coffed extract and attach the paddle mixer. Beat on low speed to mix and give it a few minutes until everthing is mixed together, scraping the sides and bottom of the bowl.  The batter will be quite liquidy (but really yummy!!)
  4. Fill the prepared tins about 2/3 of the way full (my ice cream scooper is perfect for this).
  5. Bake about 19-24 minutes or until a toothpick stuck into the middle of one comes out clean.
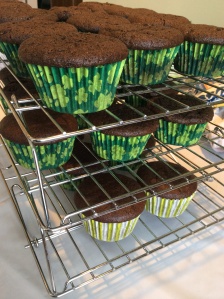
  6. Let them cool in the pan for about 10 minutes then stack them up on a cooling rack and allow to cool completely (the only way to know for sure is to eat one you know 🙂

image

For the Frosting:

  1. In the bowl of your stand mixer just add everthing. Using the whisk attachment start it off slow so that you dont have a powdered sugar explosion. When it’s combined turn that mixer up to high and let it go for about 10 mintues.
  2. Set the frosting aside for later when you’re ready to decorate.  You can also refrigerate it but when you’re ready to use it you will leave it out for a few hours to come to room temp.

For the Butterscotch:

  1. Using a medium sized, heavy bottomed sauce pan het up the butter until it’s melted using medium (towards the low side) heat. Add the sugar, cream and 1 tsp of salt and whisk it about gently until it’s well blended.  Leave it alone for a bit, whisking here and there, until it comes to a very soft boil. Let it boil that way for about 5 minutes.
  2. Remove it from the heat, add the 3 tps vanilla, vanilla beans and vanilla pod and stir it to combine. Put the pan over very very low heat (really just enough to keep it warm) and allow the vanilla to seep into the mix-about 3 minutes.
  3. Remove it from the heat, remove the pod and discard. Taste for satlyness and vanillayness and add more if necessary. Salt and vanilla vary so it’s hard to give exact amounts to use. Just judge until you like it.
  4. Pour into bottles to keep in the fridge for a few weeks and until you’re ready to drizzle.  It needs to be cooled completely to put on the cupcakes or it will melt the frosting.

When you’re ready for the cupcakes either pipe on the frosting or put it on with a spatula or knife or whatever, drizzle with some of the butterscotch, sprinkle with edible green glitter if you have it and enjoy!!

image

Note:  you can omit the butterscotch but it makes them so much better with it.

Strawberry Treat

Strawberries are delicious this year!  I love to have them in the evening for a snack but get bored of just sliced plain ones. I came across this recipe and it sounded so so so good!! And it’s delicious. The combination of sour cream and brown sugar may sound strange but it’s addictive and perfect with the berries. It stays well in a container in the fridge too.

Note: you don’t have to eat all of the strawberries at once for this.  Wash only the ones you plan to eat immediately. Once you wash a strawberry it goes bad fast.

image

Strawberry Treat

Ingredients:

  • 16 ozs fresh strawberries, washed, stemmed and cut into 1/4s
  • 4oz fat free sour cream
  • 2 tbsp brown sugar

Instructions:

  1. Pile some strawberries in a pretty dish.
  2. Combine the sour cream and brown sugar and drizzle over the berries.

Adapted from skinnytaste.com

Red Velvet Cookie Bars with Vanilla Bean Frosting

This months “What’s Baking” theme of ‘Red Velvet’ was chosen by Kim of Just Baked.  Appropriate for Valentine’s Day treats don’t you think? 99% of the time red velvet is paired with cream cheese frosting so I wanted to do something different. While I love CC frosting it’s pretty heavy.

I love love love light airy frosting. The frosting here ended up being as light as fresh whipped cream and super-vanilly which means that it will be great on all kind of things-cookies, cakes etc…. So keep it to use any time of the year. Note: I only made half of the recipe below-you can see in the photo below how much frosting you’ll have on each piece with the recipe halved. If you want more make the full recipe.

Red Velvet Cookie Bars with Vanilla Bean Frosting

image

Ingredients:

Cookies:

  • 3 & 1/2 cups AP flour
  • 1/4 cup unsweetened cocoa
  • 1/2 tsp salt
  • 1 tsp baking powder
  • 1 cup (2 sticks) unsalted butter, at room temperature
  • 1 & 1/2 cups granulated sugar
  • 2 large eggs, at room temperature
  • 2 tsp vanilla extract
  • 1 tbsp KAF Red Velvet Emulsion

Frosting:

  • 1 & 1/2 cups confectioners sugar
  • 1 cup (2 sticks) unsalted butter, at room temperature
  • pinch of salt
  • 4 tsp vanilla extract
  • 1 vanilla pod, beans set aside

Instructions:

  1. Preheat the oven to 350F. Spray a 9×13 pan with non-stick baking spray.
  2. In a bowl combine the flour, cocoa, salt and baking poweder. Whisk to evenly combine. Set aside.
  3. In theb owl of a stand mixer fitted with the paddle attachment beat the butter and sugar until light and creamy, about 3 minutes. Add the eggs, one by one, and then the vanilla. Beat until combined evenly.
  4. Little by little add the dry ingredients, just incorporating before adding more. Scrape down the sides of the bowl when necessary. Beat until a dough forms.
  5. Pour then press the dough into the prepared pan. Bake about 20 minutes or until a toothpick inserted into the center comes out with just a few crumbs.
  6. Remove from the oven and cool completely before frosting.

For the frosting:

  1. In the bowl of a stand mixer fitted with the whisk attachment add the butter and 1/4 of the sugar.  Beat on low until combined. Continue to add the sugar in this way until it’s all combined.  Add the vanilla extract and beans and  beat on highest speed for about 8 minutes or until it won’t get any fluffier. It will have the consistancy of whipped cream.
  2. Frost the cookies using an offset spatula or backwards dinner knife.

image

Cookie recipe adapted from chocolatemoosey.com.  The frosting’s mine.

WB

Previous Older Entries