My New Bolognese

If there’s one sauce that I choose more than any other to have with pasta it’s  bolognese.   During my visits to Italy I enjoyed a nice bowl of pappardelle alla  bolognese more times than I can count. The best, in my opinion, were all in Tuscany but the best of those were where they also include wild boar sausage in the sauce.  Just delicious.  Not to mention the many local Italian restaurants near me that each make their own fabulous version of the sauce.

I had a recipe that I had been making for a while but the last few times I made it I was underwhelmed.  Really disappointed even. To the point where I just threw it out.  I couldn’t tell if I had over cooked it or if the tomatoes I used had a different taste or what but I knew I didn’t like it.  So there has been a pretty long drought for home made bolognese in my house. 

And then Carrie from www.carriessweetlife.com posted this beauty oh her blog. Pancetta. Red Wine (chianti-always chianti for me). Parmesan Rind. I new that I would love it. And I did. It’s my new bolognese.  So a huge GRAZIE to you Carrie. My freezer is now full of yummy bolongese. I adapted it a bit and it’s just as delicious as it sounds.
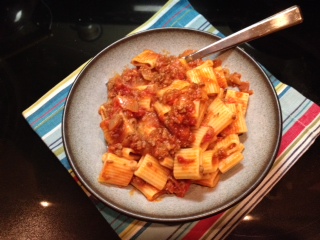
bolo1

My New Bolognese

Ingredients:

  • Olive oil
  • 5 ozs pancetta, diced
  • 2 lbs ground sirloin
  • 1 lb sweet Italian sausage, casings removed
  • 2 large yellow onions, chopped small
  • 1 large carrott, chopped small
  • 8 cloves garlic, minced
  • Kosher salt and freshly ground pepper to taste
  • 1 small can tomato paste (or half of one tube)
  • 1 cup dry red wine (chianti)
  • 1 cup beef stock
  • 2 28oz cans Muir Glen Organic crushed tomatoes w/basil
  • 2 14.5 oz cans Muir Glen Organic diced tomatoes
  • 2 bay leaves
  • 1 tbsp dried oregano
  • 1/2 tsp red pepper flakes
  • Rind from Parmesano Reggiano wedge/wheel

Instructions:

  1. Heat the olive oil over medium heat in a large stock pot. Add the pancetta and cook until it’s cooked crispy.  Add the sirloin and sausage and cook, using a wooden spoon to break it apart, until browned.  Drain the excess fat from the pan.  Add the onions, carrot, garlic and cook, stirring frequently, until the vegetables are softened.
  2. Stir in the tomato paste until it’s evenly distributed throughout the meat and vegetables. Add the wine and cook, scraping the pan to get the bits off of the bottom, until the wine evaporates. Add the stock, tomatoes, baty leaves, oregano, pepper flakes and Parmesan rind. Bring to a bubble then reduce to medium low to just simmer gently.
  3. Cover and let it simmer for 5 hours. Taste and season with salt and pepper if needed. Remove the bay leaves and rind before serving or freezing.
  4. To serve place cooked pasta and desired amount of sauce in a pan over medium heat with some of the pasta water. Stir to coat the pasta with the sauce and serve.
  5. To freeze let the sauce cool completely then spoon it into quart-sized ziplock bags.  Give the bags a few shakes or gentle taps on the counter to get the air to the top. Leaving just a small portion of the zipper open lay the bag flat and gently push the air out.  Zip the remainder of the way and lay flat in the freezer. Don’t forget to label the bags!!

So this is how much sauce this recipe makes.  Those are quart-sized ziplock bags and smaller 1-3 cup containers. 

bolo1

bolo2

I have a funny feeling that the different brands of tomatoes that I used before this recipe were the problem.  After cooking for a while they tasted bitter and made the sauce yucky.  I recalled seeing that America’s Test Kitchen had done one of their comparisons of canned tomatoes recently so I went to their website and they recommended the Muir Glen Organic higher than any other and gave them a stellar review.  They were right on! The tomatoes were perfect and tasted just like they should. I hightly recommend using them.

bolo2

Baked Parmesan Potatoes

It’s time for another Blogger’s Choice Swap! This month’s theme was ‘Vegetarian’ and I was assigned Katie’s blog www.sotastysoyummy.blogspot.com.  She has some really great recipes on there.  If you’re familiar with my blog or me you know that I love Parmesan cheese (and most other cheeses really) so when I saw this recipe I chose it immediately. Baked Parmesan Potatoes? YUM!! They’re super simple to make and are really delicious. I had one potato as a side to a fantastic salad that I made one night.  They come out crispy on the outside and fluffy and creamy in the middle. The parmesan and butter make a slight crust along where the potato sat in the pan.

potato2

Baked Parmesan Potatoes

Ingredients:

  • 2 russet potatoes, scrubbed, dried and quartered
  • 1/4 cup butter (half of a stick), melted
  • 2 tbsp freshly grated Parmesan cheese
  • 1 tsp garlic powder
  • olive oil
  • kosher salt and freshly ground black pepper

Instructions:

  1. Preheat oven to 400 degrees.
  2. Pour the melted butter into an 8×8 baking dish and then sprinkle the parmesan cheese and garlic powder evenly over the butter.
  3. Place the potatoes, long cut side down, onto the butter.  Brush the skins lightly with olive oil and season with salt and pepper.
  4. Bake for 30 minutes then turn the potatoes so that the short cut side is in the butter. Bake for another 5 minutes.
  5. Remove from the oven and allow 5 minutes to rest.
  6. Serve promptly.

potato4

Thank you Sarah at http://tasteofhomecooking.blogspot.com for hosting these great swaps!!

Check out the other great recipes and blogs involved in the swap here:

Butternut Squash Chili with Queso Fresco-slow cooker

This vegetarian chili is a delicious mix of flavors and textures.  It’s a perfect dish to put in the slow cooker in the morning and then have it be ready when you go home after work. I prepped the onion mixture, washed the beans and peeled and cut the squash up the night before while prepping that dinner, kept them all in the fridge overnight and then just put everything in the cooker before I walked out the door in the morning.  So easy. Super delicious.

You could easily add chicken or beef or meatless crumbles or, for a vegan version, use soy cheese.

chili1

Butternut Squash Chili with Queso Fresco-slow cooker

Ingredients:

  • 1 tbsp olive oil
  • 1&1/2 cups yellow onion, chopped small
  • 1 garlic clove, minced
  • 1.5 tbsp chili powder
  • 1.5 tbsp ancho chili powder
  • 3/4 tsp ground cumin
  • 4 cups butternut squash, peeled and cut into 1/2 inch cubes (about 1 lb)
  • 2 16oz cans pinto beans, rinsed and drained
  • 1&1/2 cups water
  • 1 16oz can sweet corn, drained
  • 1 tsp salt
  • 1 28oz (or 2 14.5oz) cans diced tomatoes (I used Hunts Fire Roasted)
  • 1 4.5oz can chopped green chilis (not drained)
  • queso fresco
  • scallions

Instructions:

  1. Heat oil over medium heat in a large, non-stick skillet. Add the onion and garlic, cook for a few minutes until tender. Add the chili powders and cumin and cook for 2 more minutes, stirring constantly.   Set aside.  (If you’re cooking ahead allow to cool completely and place in an airtight container in the fridge.)
  2. Into the slow cooker put the onion mixture, squash, and remaining ingredients through and including green chilis.
  3. Cover and cook on low for 8 hours.
  4. Ladle chili into individual bowls and sprinkle with cheese and scallions.
  5. To freeze allow the chili to cool completely. Ladle into quart-sized ziplock bags,  get all of the air out of the bag, seal and freeze.

Adapted from Cooking Light Slow-Cooker Tonight! cookbook (which is very good)

Harvest Salad

This is such a delicious salad! Tart granny smith apple, crunchy toasted pecans, tangy dried cranberries, sweet pear and a zingy dressing make this one of my new favorites.  It came together very quickly.

harvest1

Harvest Salad

Ingredients:

  • 1 cup pecans, toasted
  • 1/4 cup shallot, finely chopped
  • 2 cloves garlic, minced
  • 1 tbsp Dijon mustard
  • 1/2 tsp granulated sugar
  • 1/2 tsp table salt
  • 1/4 tsp pepper
  • 2 tbsp white wine vinegar
  • 1/2 cup olive oil
  • 1 head romaine lettuce
  • 1/2 Bosc pear, cut into small pieces
  • 1/2 granny smith apple, cut into small pieces
  • 1/2 cup dried cranberries
  • freshly grated cheddar cheese or crumbled goat cheese

Instructions:

  1. In a small non-stick skillet over medium heat toast the pecans, occasionally shaking the pan, until golden and fragrant. About 5 minutes.
  2. While the pecans are toasting put the shallot and next 6 ingredients  including the vinegar in a bowl and whisk to combine.  Continue whisking and stream in olive oil until emulsified.
  3. In a large salad bowl place the lettuce, follow with pecans, fruit and cranberries. Drizzle with the dressing and toss.  Place half of the salad on each of 2 plates, sprinkle with cheese, and serve.

I ate only half of this salad for dinner one night.  I did not dress the salad all together. I placed each different component in separate ziplock bags and brought them to work the next day.  I wrapped the halves of the pear and apple and brought those separately and chopped them up when I was ready for lunch. It came out perfectly.

 Makes 2 servings.  Adapted from All You, November 2013.

Crispy Parmesan Bread

Often when I make pasta or soup I’ll make up some of this delicious crunch bread to have on the side. It’s great to eat plain or to wipe up the last bits of a bowl of soup or sauce.

And it couldn’t be easier to make. You can use pretty much any bread.  You need to use freshly grated parmesan though-something that you should keep on hand at all times anyway.

bread

Crunchy Parmesan Bread

Ingredients:

  • Small baguette or other soft crust long loaf such as italian bread
  • Butter
  • Freshly grated Parmesan cheese

Instructions:

  1. Cut bread into the desired shapes and put into the toaster oven to toast very slowly.
  2. When they’re just a touch brown remove the bread and spread a bit of butter over the bread.  Return to the oven and melt the butter.
  3. Remove and sprinkle the parmesan cheese and then put back in the oven for a few more minutes.  Watch it carefully-parmesan burns quickly. Remove when just melty.
  4. Enjoy!!

My Mom used to make these for me. She doens’t have a blog (but she should) so they’re originally her idea 🙂

Chicken Parmesan Soup (slow cooker)

Well here we are in November. The weather is chilly and it’s time to start making some of  the recipes for soups, stews etc.. that I’ve collected. 

This one was a recent find but fit perfectly for last Thursday night’s dinner.  A rainy chilly evening. Husband (huge chicken parmesan fan) was home. It was also going to have to be a fast dinner as I had to get to a meeting.

So I put everything in the slow cooker in the morning and in the evening the soup was ready and it smelled and tasted delicious!! I served it over elbow pasta and made some gorgeous crunchy parmesany bread to go with it.  This is a hearty but not heavy soup. The chicken and soup are very light-how much pasta you put in the bowl will determine how heavy a meal it is. Perhaps next time it will go under the broiler with a slice of mozzarella on top…..

parm1

Chicken Parmesan Soup (slow cooker)

Ingredients:

  • 2 lbs boneless, skinless chicken breasts
  • 46oz tomato juice
  • 32oz chicken broth
  • 6 cloves garlic, smashed
  • 1 tsp dried basil
  • 1 tsp dried oregano
  • 1 cup freshly grated Parmesan cheese plus extra for topping
  • kosher salt and freshly ground black pepper to taste
  • 8 ozs elbow macaroni (or other small pasta)

Instructions:

  1. Put everything but the pasta into the slow cooker and cook on low for 7-8 hours.
  2. Remove the chicken from the cooker with tongs and set onto a plate and let cook slightly.  Shred with 2 forks or your fingers if cool enough.
  3. Return the chicken to the slow cooker and keep on warm.
  4. Cook the pasta as per the box instructions. Drain pasta.
  5. Put pasta on the bottom of a soup bowl and ladle soup and chicken over the pasta, sprinkle with additional cheese if desired, and serve.  

This makes a lot of soup. The original recipe called for adding the pasta to the slow cooker but, in the interest of left overs, we opted to keep it out that way we could add fresh pasta each time.

Adapted from www.eatathomecooks.com

Fast Chicken & Cannellini Bean Chili

So what is chili exactly? Google that and you’ll find about 4 trillion different answers.  And how is it different from stew? And then what’s the difference between stew and soup?  Dizzying.

In any event the original name of this recipe did call it a ‘chili’ so I’ll keep that. I guess I’m just used to a tomato based chili with beef and beans and onion so for me having a chili that is not red and has onions and green chilis and chicken immediately makes me think its soup. But surprisingly it has the taste and consistency of chili. A subtle heat from the chilis, the beany texture, the chicken chunks and the yummy onions all make for one delicious bite.

This came together in less than 30 minutes making it perfect for a fast weeknight meal on a chilly night. If you used rotisserie or left over chicken it would be even faster.

chili

Fast Chicken & Cannellini Bean Chili

Ingredients:

  • 1 tbsp canola oil
  • 1lb skinless, boneless chicken breast cut into bite sized pieces
  • 3/4 tsp salt, divided
  • 1 small onion, halved then sliced thin
  • 3 cloves garlic, smashed
  • 2 tsp ground cumin
  • 1 tsp ground coriander
  • 1/2 tsp dried oregano
  • 1/4 tsp red pepper flakes
  • 3 cups cannellini beans, rinsed and drained
  • 1 cup water
  • 10 ozs canned green chilis
  • 14 ozs low sodium chicken broth
  • 1/4-1/2 tsp ancho chili powder
  • 1/4-1/2 tsp chili powder
  • cilantro leaves

Instructions:

  1. Heat the oil in a dutch oven over medium-high heat.  Sprinkle 1/4 tsp salt on chicken then add chicken to the pot.  Saute 4 minutes. Add onion through the pepper flakes and saute another 3 or 4 minutes. Add 2 cups of the beans and the water and, using a wooden spoon, be sure to get everything scraped and mixed thoroughly. Add 1/2 tsp salt,  7 ozs of chilis and the broth and bring to a boil.
  2. Mash up the remaining beans and chilies and add it to the pot. Reduce to a simmer and simmer for 5 minutes. Taste and add ancho and chili powders to taste and simmer a few more minutes.
  3. Serve with cilantro.

Adapted from Fast Chicken Chili, Cooking Light, Sept 2012


Best Tasty Shredded Chicken BBQ-slow cooker

Real BBQ people will be rolling their eyes at this name won’t they? It’s not REAL BBQ since 1) I don’t own a smoker (and you really need that for it to be real BBQ right?) and  2) I cooked it in my slow cooker and 3) I used jarred (GASP!!) BBQ sauce.

I will assume though that I will be quickly forgiven for this naming faux pas once those eye-rollers taste this chicken. I didn’t name it what I did because it’s only mediocre.  It’s delicious. It’s also so easy to make it nearly makes itself.

I used a BBQ sauce from my local Fairway Market-it’s their own bbq sauce and was in the middle of the line-not sweet, not hot, just smokey with a fair balance of sweet and spice-but nowhere near hot. In fact, it’s called ‘Schmokey’ which I think is cute. So get yourself a great tasting sauce for this and tuck in for a few hours.  Look at that beauty!!

bbq11

Best Tasty Shredded Chicken BBQ

Ingredients:

  • 1 large yellow onion, cut in half then sliced to 1/4 inch pieces
  • 1/2 lemon, sliced, seeds removed
  • 2.5 lbs boneless, skinless, chicken breasts (about 8 breast halves)
  • 1 18oz jar BBQ sauce
  • 1/2 cup cola (not diet)
  • 3 (+/-) tbsp arrowroot
  • fresh bread that can hold up to the chicken (I used fresh French bread cut thickly), thinly sliced extra sharp cheddar cheese etc.. to assemble sandwiches.

Instructions:

  1. Place onion and lemon in the bottom of the slow cooker pot. Place the chicken on top of that and pour the BBQ sauce and cola over it.
  2. Cover and cook on high for 1 hour and then cook for 4 hours on low or until chicken is cooked through.
  3. Using a slotted spoon or a spider remove the chicken pieces and put them on a platter to cool slightly.  Remove the lemon pieces and discard. Leave the onions and the sauce in the pot and add the arrow-root 1 tbsp at a time, stirring to combine, allowing it to rest for a few minutes and thicken. It might take another tbsp or 2 but be patient-it will thicken eventually.
  4. While you’re dealing with the sauce resting/thickening shred the chicken.  Forget the 2 forks. If it’s cool enough just use your hands and pull it apart. 
  5. When sauce has become thick add the chicken back into it, stir, and let it cook for another few minutes to make sure every little piece has a nice coating of sauce.

As far as serving I made an outstanding, but very simple, sandwich. I also think that this would be great on nachos, baked potatoes or hell just tasty with a fork.

This made 5 sandwiches like you see in the photo and I froze about 4 cups as well.

This was an interesting adaptation. I started off originally with the Chicken Barbecue recipe from the Cooking Light Slow Cooker book.  Everything is the same until the chicken is finished cooking.  The original recipe instructions were to mix flour and water and then add that to the sauce. Disaster. It rolled up into these disgusting globs as soon as it hit the sauce. I had to pick every one of them out of the sauce. Yuck. I’m glad I was able to salvage the recipe at all-even happier that it came out so amazingly delicious.  The original recipe also didn’t shred the chicken or make a sandwich-just served the breast with sauce on it. So I guess this is highly adapted from that recipe.

Brown Sugar & Maple Steel Cut Oats

Like many people I found myself toting along those small envelopes of instant maple and brown sugar oatmeal to work.  We all know that oatmeal is so good for you and keeps you full and gives you lots of energy for the morning so it’s good to eat but…… I don’t know about you but my initial reaction when eating the stuff from the envelope wasn’t ever ‘wow yummy!’ it was more along the lines of ‘wow it’s glue’.  Yuck.  For a while I was measuring out 1/4 cups of rolled oats and bringing them to the office too which was somewhat better but still pasty.

I say no more!!!!

Recently I was inspired by one of the America’s Test Kitchen episodes that featured steel cut oats and how to cook them overnight to avoid the 45 minutes of cooking in the morning that they normally take. So I bought a can (how retro) to see what I could do.  I was thinking if I can cook them overnight then reheat in the AM why can’t I cook them normally and then reheat?  And I can!! And how easy it is!!! There’s literally 2 minutes of attention that you have to pay to the pot during the whole 40 minutes that it’s cooking (aside of a few stirs). I let it cook while I vacuumed yesterday.

Do you know that steel cut oatmeal reheats amazingly well? The texture is still al dente (for lack of a better way to say it) and the flavor is the same as when it was first made. Below you will find instructions for a week’s worth (plus a pretty good sized bowl right away) of small containers of steel cut oatmeal. I prepare it on Sunday and pack it into small 1/2 cup containers to bring to the office all week. So give it a try! I’m sure that you won’t want to go back to the paste after this.

oat2

Brown Sugar & Maple Steel Cut Oats

Ingredients:

  • 3.5 cups water
  • Pinch of salt
  • 1 cup steel cut oats (I used John McCann’s Irish Oatmeal)
  • 1.5 tbsp vanilla extract
  • 1.5 tbsp maple syrup (try to use the real stuff) plus more for drizzling
  • 1/2 cup milk (use whatever kind you like-skim, whole, etc..)
  • brown sugar for topping

Instructions:

  1. In a small nonstick stockpot bring the water to a boil and add salt.
  2. Stir in oatmeal and reduce heat to low.
  3. Cook for 25 minutes, stirring occasionally.
  4. Add the vanilla, syrup and milk and stir until thoroughly combined.
  5. Cook for another 10 minutes, stirring occasionally.

At this point you’re ready to eat it. Enjoy!!!

If you’re going to store it to eat later allow the oatmeal to cool in the pan, stirring from time to time. When it’s cool spoon it into containers with lids and keep it in the fridge. I used 1/2 cup containers. To eat I put the oatmeal in a small bowl, break it up with a spoon and microwave for a minute or so until it’s hot.  Then I sprinkle with brown sugar and drizzle the syrup on it. YUMMY!!

This recipe is all mine. I’m interesting in exploring other toppings, mixing ins etc… I saw one the other day that had toasted hazelnuts on top and that sounded declicious. Perhaps I’ll bake an apple and mix that in……hmmmm

Homemade Chicken Stock (from left over roast chicken) slow cooker

I have always bought chicken stock at the store. (If you read my roast chicken post you know that this is only about the 4th chicken I’ve ever roasted.) But this time is different.  We picked most of the meat off of the bones and I put the carcass in the fridge in a container for 2 days until I had time to make the stock.  Here it is in the morning before it started cooking. Excuse the green tinge-my flourescent lights do that-but in there you can see celery, carrots, onions, parsley, thyme, peppercorns and just little flashes of what’s left of the chicken.

stock1

Homemade Chicken Stock

Ingredients:

  • 1 carcass (hopefully with a litte meat still on it) from roast chicken
  • 1 large yellow onion, quartered
  • 1 celery stalk cut into one inch pieces
  • 1 carrot cut into one inch pieces
  • some peppercorns (i used about 15 or so)
  • a few sprigs of fresh thyme
  • a few sprigs of fresh parsley
  • many cups of water

Instructions:

  1. Place the carcass into the bottom of the cooker–you may have to cut it into a few pieces for it to fit.
  2. Add the rest of the ingredients through the parsley. Stick the larger pieces down into the chicken if possible.
  3. Add enough water to cover the carcass by an inch or 2.
  4. Cook on low for 10 hours.
  5. When finished cooking taste and add salt if desired. Let it cool in the cooker until it’s cool enough to handle then strain out everything, just leaving the liquid. Refrigerate until cold, skim off the fat and then freeze in portions to use later.

A tool like this is perfect for skimming the fat off of the top of the stock.

stock3

I carefully ladeled stock into 2 ziplock bags and poured the remaining stock throguh the strainer above into a small container and put everyone in the freezer until I’m ready to make soup or use the stock for cooking.  I opted to NOT add any salt before I froze the stock. I will add it when I use it.

stock2

Adapted from thekitchn.com recipe.

Previous Older Entries Next Newer Entries