24 Jul 2013
by sparksfromthekitchen
in Lunch, Main Dish, Salad
Tags: bacon, eggs, sriracha
Some times I like egg salad. Those times include when it’s not drowning in mayonnaise and when it’s zingy! Who likes mushy bland egg salad is a mystery to me….. The egg salad below is anything but mushy and bland. It’s really tasty and it’s light and airy. If you like bacon and sriracha and eggs you’ll like this a lot.

Sriracha & Bacon Egg Salad Sandwich
Ingredients:
- 3 large eggs, hard-boiled, cooled and peeled
- 4 strips bacon, cooked (2 broken into small pieces, 1 set aside for topping and 1 for the dog 🙂 )
- 1 generous tbsp low fat mayonnaise
- 3-4 tbsp finely chopped red onion
- 1 generous tsp sriracha
- salt & pepper to taste
- 1 piece of romaine lettuce
- 2 slices of bread
Instructions:
- Gently chop eggs and yolks and put them in a bowl. Add everything else but the 1 strip of bacon, bread and lettuce and stir gently.
- Place lettuce on one slice of bread, top with salad, top salad with bacon, place 2nd slice of bread on top and enjoy.
Greatly adapted from Cooking Light magazine, August, 2013
Makes 1 sandwich
15 Jul 2013
by sparksfromthekitchen
in Appetizer, Lunch, Main Dish, Side Dish
Tags: corn, edamame, Quick and easy, rice
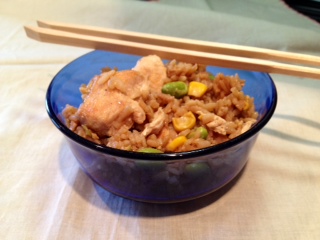
So last week my Wednesday night went a bit like this: home from work at 5:40, walk dog, make a dinner in 20 minutes and get to a meeting by 6:30 that ended up lasting until 11:00. Yeah it was that kind of day. And night. I had to think of something that I couldn’t mess up, something that I could make in a flash (snicker snicker), and that had a bunch of good stuff in it and that was tasty too. Thankfully Husband made up 3 cups of rice for me the day before so it was all ready in the fridge. The rest of the recipe is a mish-mosh of stuff that I had in the fridge and freezer. And it was perfect! It was delicious, filling but not FILLING, and had a nice balance of tastes and textures. It’s more of a stir fry than a fried rice really-but who cares-it’s good and FAR better for you than stopping for take out.
Next time you’re going to run short on time give this recipe a try. It took me about 18 minutes from chopping the onion to when it was in the container ready to go.

Flash Chicken Fried Rice
Ingredients:
- 3 cups cooked day-old rice (I used white-feel free to use any other kind you’d like)*
- 1 large chicken breast, trimmed of fat, boneless and skinless cut into small bite sized pieces
- 2 large eggs
- 1 small yellow onion, cut into very thin strips
- 2 cups frozen edamame
- 2 cups frozen corn
- 4 tbsp sesame oil
- splash of fish sauce
- a few tbsp low sodium soy sauce (to taste)
- splash of hoisin sauce
Instructions:
- In one skillet over medium high heat warm 1 tbsp sesame oil. When hot add the chicken and cook until nicely browned and cooked thoroughly. When cooked set aside.
- While the chicken is cooking and in another pan over medium-high heat put 1 tbsp sesame oil. When hot add the onions and stir for a minute or two and then add the edamame and corn and cook until no longer frozen. Add the fish sauce and stir for a minute or two.
- In a 3rd and large pan (that can hold everything and be stirred) over high heat put the remaining sesame oil and, when hot, add the rice and stir to heat through. Add the edamame mixture and cook until the rice and veggies are all mixed and the rice has a nice browned outside.
- In the same pan used to cook the edimame mixture, over medium heat, crack the eggs, add a spoonful of the rice mixture and mix quickly to cook completely. Add the egg mixture to the rice then add the chicken to the rice, stir to combine and remove from heat. Add the soy and hoisin sauces and stir to combine. Serve.
I admit I used a bunch of pans while throwing this together. I’m sure if I had more time I could’ve figured out how to use less–but my purpose was to make a great dish fast, not avoid dirtying dishes.
This recipe makes quite a bit. I took one container with me to the meeting, had some for lunch the next day and still had a bit left over. I’d say about 4.5-5 cups total.
I think that this would also be great with some bell pepper strips, some snow peas etc…add at will-veggies are good for you!
*if you don’t have pre-made rice it will take that much longer to make this dish.
12 Jul 2013
by sparksfromthekitchen
in Appetizer, Lunch, Main Dish, Snack
Tags: chicken, panko, sriracha
I really do like Sriracha and have used it for quite a few years. I came across this recipe over a year ago and it has sat, untouched, buried deep in my folder of ‘to make’ recipes——which is pretty thick.
As luck would have it Husband bought 2 large family packs of chicken breasts recently (on sale woot!! woot!!) so I’ve been looking for a few recipes to use them up and I came across this one. I wish I would have made these sooner-they’re delicious! The chicken is juicy and perfectly cooked, the coating is hot and crunchy and really tasty and there’s really nothing to them-just great flavor.

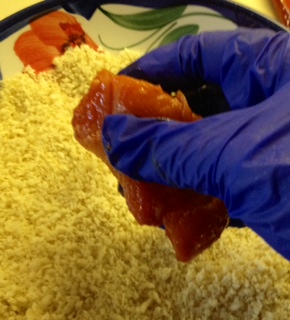
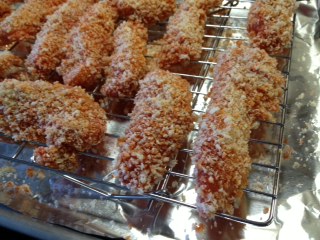
Crispy Sriracha Chicken Bites
Ingredients:
- 1/4 cup Sriracha
- 1 tbsp rice vinegar
- 1/2 tsp fresh grated ginger (or ground ginger powder)
- 1/2 tsp fish sauce
- 1/2 tsp soy sauce
- 2 chicken breasts, boneless and skinless, cut into equal strips (mine were about 1 inch wide) or about 1/2-3/4 lb
- 1&1/2 cups Panko bread crumbs
- 1 tsp white pepper
- 1 tsp garlic powder
Instructions:
- In a large ziplock bag put the ingredients starting with Sriracha through and including the chicken. Squish the chicken around to evenly coat and allow to sit at room temp for 30 minutes.
- Pre-heat oven to 425. Line a baking sheet with foil and then place a cooling rack on top of the foil. Set aside.
- When the 30 minutes is up use tongs or gloves (I love my surgical gloves for things like this) to roll each marinated piece of chicken in the Panko and set it on the baking sheet. Repeat with all chicken strips. Be sure the pieces aren’t touching each other on the rack.
- Bake for about 20 minutes (if you cut your strips larger or smaller it may take more or less time) or until they’re cooked thoroughly.
- Serve with assorted dipping sauces if desired.


Adapted from http://sotastysoyummy.blogspot.com/2012/04/sriracha-chicken-strips.html
10 Jul 2013
by sparksfromthekitchen
in Appetizer, Lunch, Main Dish, Salad
Tags: chicken, salad
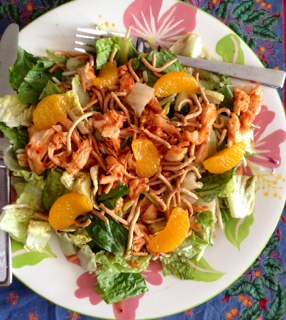
This is one gigantic delicious salad filled with great flavors and textures. The zingy chili sauce, the slightly sweet dressing, the crunchy noodles, the bright mandarins and the crispy veggies-everything just comes together.
I named it ‘Red Dragon’ chicken salad because of the zing, heat and red sauce on the chicken. Besides it sounds much better than plain old ‘chicken salad’, no? Yes.
Unfortunately I can’t take full credit for this salad. I based in on a salad that I enjoyed a few weeks ago at Buffalo Wild Wings with Husband. It was our first visit. I’m not a fan of chain restaurants but I liked it there more than I thought I would. The wings were delicious and they have a great variety of foods.

Red Dragon Chicken Salad
Ingredients:
- 4 cups salad (combination of shredded carrots, cabbage, lettuce and broccoli)
- 1/3 cup crispy chow mein noodles (I used La Choy)
- 3 tbsp Newmans Own Low Fat Sesame Ginger salad dressing
- 1-2 tbsp Asian Zing sauce (from Buffalo Wild Wings)*
- 1 boneless, skinless chicken breast grilled and sliced
- 6 mandarin orange segments
Instructions:
- Put salad and dressing together, toss to combine. Sprinkle noodles over the salad. Set aside.
- Mix the Asian Zing sauce with the chicken and spread over salad.
- Arrange mandarin slices around the outside.
This makes one large salad or 2 smaller salads.
*their Asian Zing sauce tastes to me like Sweet Thai Chili sauce and sriracha so if you don’t have the sauce or want to buy it you can mix those 2 ingredients together to the desired heat level and use that on the chicken instead.

08 Jul 2013
by sparksfromthekitchen
in Bread, Breakfast, Dessert, Freezer, Prep-Ahead, Freeze then Cook, Snack
Tags: muffins, strawberry, yogurt
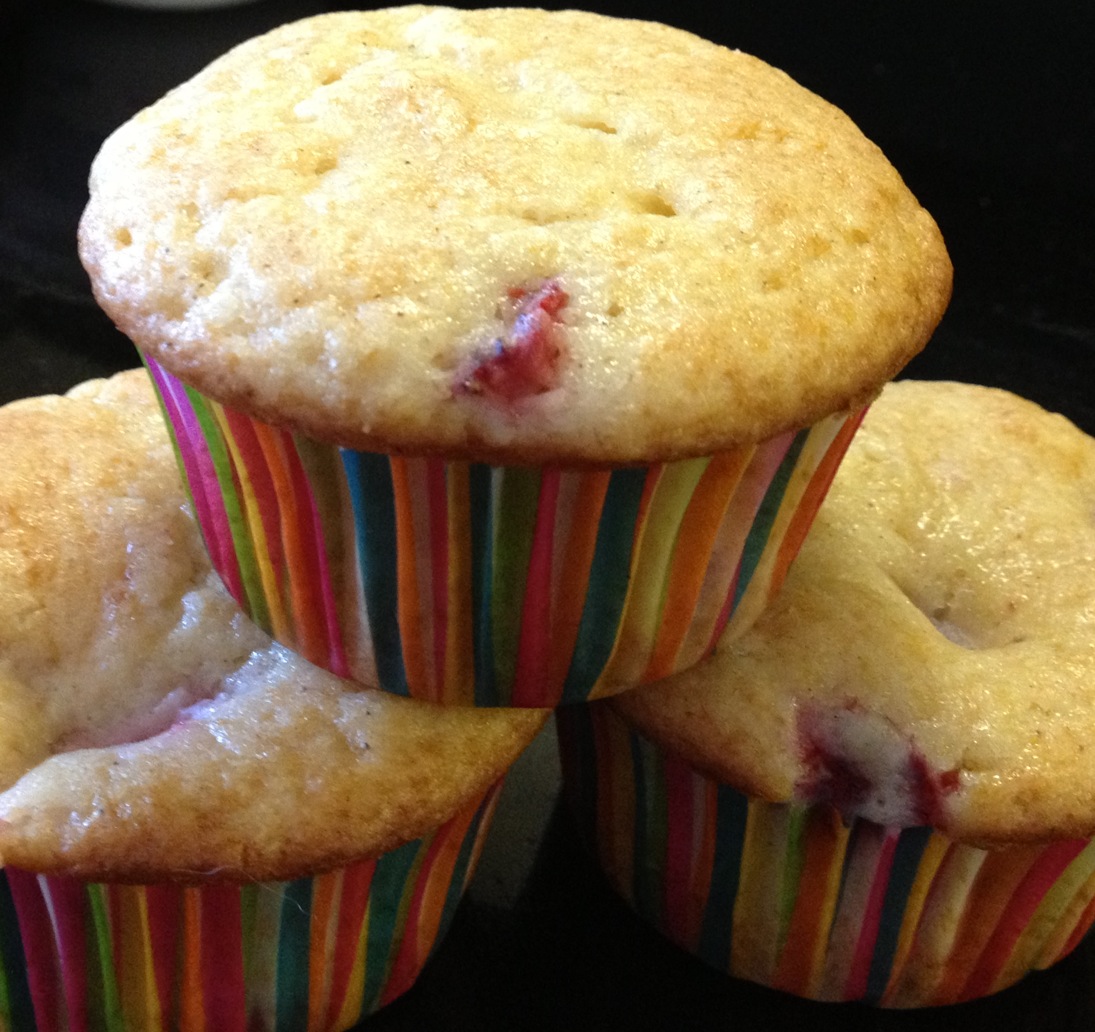
These muffins are lovely and light and oh so tasty–perfect muffins to go with slices of delicate strawberries for the summer.
There’s not really all that much else to write except for the recipe…..

Strawberry Delight Muffins
Ingredients:
- 6 ozs Greek Yogurt (I used Fage 0%)
- 2 ozs fat-free Sour Cream
- 1/4 cup unsalted butter, softened
- 1&1/2 cup granulated sugar
- 1/2 cup Egg Beaters (or 2 large eggs)
- 1/2 cup milk
- 1/2 tsp vanilla extract
- 1/4 tsp strawberry extract
- 2 cups AP flour
- 1&1/2 tsp baking powder
- 1/2 tsp baking soda
- 1/4 tsp salt
- 1/4 tsp cinnamon
- 1 cup fresh strawberries, chopped small
Instructions:
- Pre-heat oven to 350.
- Place liners in muffin tin and set aside.
- In a large bowl using an electric mixer cream together the yogurt, sour cream, butter and sugar. Then add the Egg Beaters, milk, vanilla and strawberry extract. Stir until combined-being careful to not over-mix. Set aside.
- In another bowl place the flour, baking powder, baking soda, salt and cinnamon and whisk to combine.
- Add 1/4 of the dry ingredients to the wet and stir until just combined. Continue adding the dry ingredients in increments and mixing. Do not over mix. Gently fold in the fresh strawberries.
- Fill the liners in the muffin tin to about 3/4 of the way full and bake for about 23-28 minutes or until the tops are light golden brown. Allow to cool in the tin for about 10-15 minutes then remove the muffins from the tin and place onto a cooling rack.
Yield: about 18-20 muffins. I made 12 muffins and froze the remainder of the batter to use another time.

Greatly adapted from the Strawberry Cream Cheese Muffins from http://www.bos-bowl.com
27 Jun 2013
by sparksfromthekitchen
in Lunch, Main Dish
Tags: chicken, mozzarella, Quick and easy
Here’s an easy and really tasty weeknight meal that you can have on the table in about 30 minutes. The chicken coating is crunchy and delicious, the cheese is deliciously stringy and melted and the sauce is whatever you want it to be-home made or jarred-it’s up to you. I prefer home-made but since I was out I used some jarred sauce. I like having them in the pantry to use in a pinch.
I opted to forego the pasta that’s usually served with this and just have some steamed veggies and a salad with it. I didn’t miss the pasta.
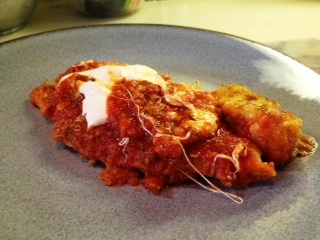
There’s no neat pretty picture of this with the cheese ‘just so’ and the sauce dribbling ever so seductively down the plate. I slapped this piece on my plate, took 2 pics, and then dug in. If you were as hungry as I was and smelled this delicious stuff you would’ve done the same 🙂

Skillet Chicken Parmesan
Ingredients:
- 1-1.5 lb boneless skinless chicken breasts, trimmed of fat and cut and/or pounded to equal thin pieces about 1/2 inch thick.
- 2 large eggs, lightly beaten
- 1/2 cup AP flour
- 2-3 cups Panko
- a few tbsp olive oil
- Italian seasoning
- kosher salt and freshly ground black pepper
- 1/2-3/4 cup thinly sliced fresh mozzarella
- 3-5 cups marinara sauce (your preference on amount and type of sauce)
Instructions:
- Place flour in one shallow bowl, the eggs in a 2nd and the panko in a 3rd and place the bowls next to each other. Season the flour and panko with salt, pepper and italian seasoning.
- Heat 2 tbsp olive oil in a non-stick skillet (large enough to hold the chicken in 1 layer or almost all in one layer-a little overlapping is ok) over medium/high heat.
- Take 1 piece of chicken, roll it around in the seasoned flour to coat it, shake off the excess, dredge through egg then roll in the panko to coat. Place in the pan and cook until first side is browned and crispy, then flip it over and do the same for the other side until it’s cooked through thoroughly. Set aside and keep warm.
- Repeat with each piece of chicken. You may place more than one piece in the pan but do not crowd it.
- Pour the sauce into the same pan and set over medium/low heat until thoroughly heated then place the pieces of chicken back in, ladle some of the sauce over the top of the chicken and then top the chicken with mozzarella and either cover with a lid and leave it on the stove until the cheese is melted or place in the oven (if you have an oven-safe pan) until cheese is melted.
- Serve immediately.
You may also serve over pasta or then put the chicken into a hero roll for a great sandwich.
26 Jun 2013
by sparksfromthekitchen
in Condiment/Topping, Dessert
Tags: balsamic vinegar, chianti
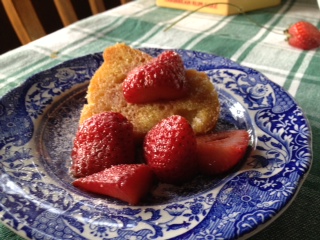
These beautifully tart, sweet and tangy strawberries are perfect over ice cream, cake, frozen yogurt or just by themselves. They are so versatile! A perfect summer treat.
I’ve mentioned the cookbook Twelve a few times on this blog. It has such wonderful seasonal recipes. One of those recipes is what I based this one on. I hope you enjoy it as much as I do. I don’t recommend making this more than 2 or 3 hours ahead of serving as the berrys will become mushy, but allow at least 30 minutes for marinating before serving. Hight quality chianti and balsamic vinegar are so important here.
This past weekend I attended a family party at my Grandmother’s house and served this for dessert (doesn’t my she have beautiful plates?) over a rum cake that I purchased in the Caribbean in April. It was delicious!!

Chianti & B alsamic Strawberries
Ingredients:
- 1 lb container fresh strawberries
- 3/4 cup chianti
- 1/4 cup water
- 3 tbsp balsamic vinegar
- 1/3 cup superfine sugar plus extra for sprinkling
Instructions
- Wash strawberries, cut green tops off and cut into halves or quarters or leave whole if small. Put strawberries into a non-reactive bowl (like stainless steel).
- Add the other ingredients except for the sprinkling sugar and let marinate at least 30 minutes before serving (up to 3 hours).
- Top the cake with the strawberries, drizzle a bit of the wine sauce and then sprinkle with a bit of sugar.

24 Jun 2013
by sparksfromthekitchen
in Side Dish
Tags: cheese, green beans
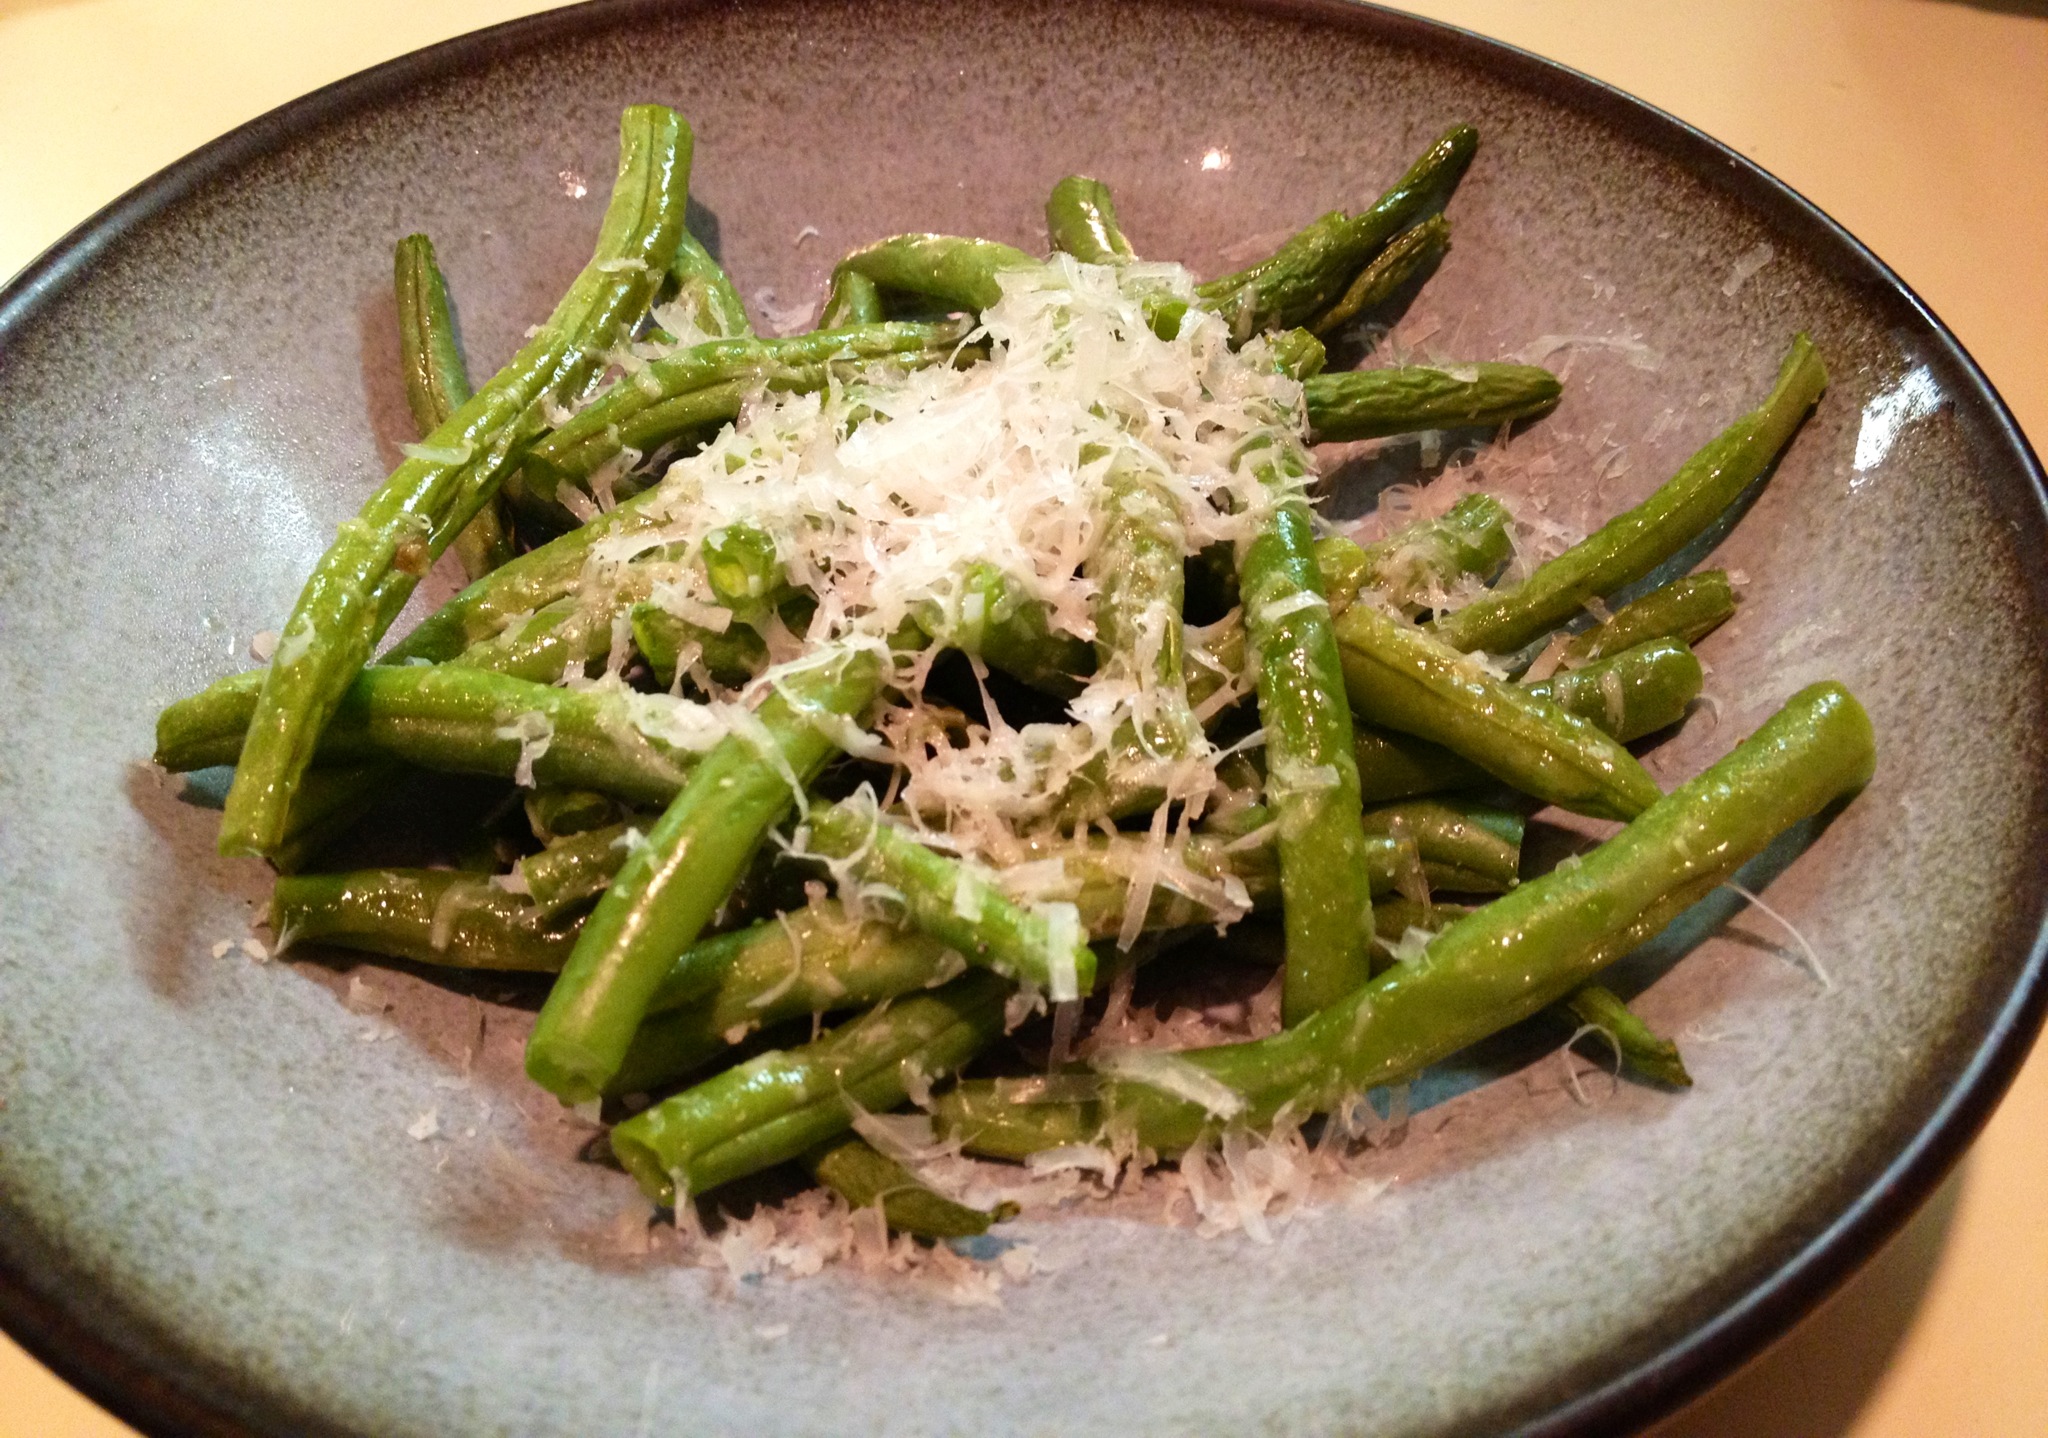
I love green beans. I always have. When I was little I loved eating them raw and I still do. Now that I’m old enough to use the oven I also roast them. Roasting is my preferred method of cooking them too as I basically like them cooked through but still very crisp. As you can see in the photo below I grated some cheese on top. YUM! Could it be any easier? Cut each end off, throw them onto a baking sheet, sprinkle a little of this and a little of that and then **abracadabara** they’re done. The answer is ‘no’. It cannot be any easier. This recipe is a basic guide. Use your imagination. If you like spicy try a touch of hot sauce or cayenne pepper. Try other salts. Try other peppers. Use onion powder instead of garlic powder. Or just leave them plain. Green beans are totally fun.

Roasted Green Beans
Ingredients:
- As many fresh green beans as you (and whoever else is with you) will eat, washed and ends trimmed and beans relatively dry.
- Olive oil to drizzle over them
- kosher or sea salt to sprinkle
- white pepper to sprinkle
- freshly grated pecorino romano cheese
- whatever else you think appropriate
Instructions:
- Pre-heat oven to 425F.
- Spread beans on one layer on a baking sheet. Put them close together.
- Drizzle oil, salt, pepper and any other spices you like on them then toss with hands to evenly coast the beans with the oil and spices then spread them out evenly.
- Bake for about 10-15 minutes-until desired crispyness has been met.
- Put them on the plate or in the bowl and sprinkle with the cheese.
21 Jun 2013
by sparksfromthekitchen
in Appetizer, Condiment/Topping, Dessert, Side Dish, Snack
Tags: apricot, dipping sauce, rum
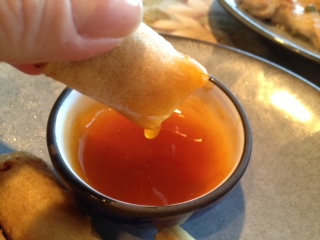
Wow!! What a flavor this sauce has. Sweet and tart from the apricot and just slightly rummy-just enough to taste. It’s delicious! I wish I had made this earlier in the week when I made the baked sweet potato fries-it would have been delicious on them.
I made this recipe for the a recipe swap that I’m involved in with some other great blogger friends which is hosted by Sarah from http://tasteofhomecooking.blogspot.com. This swap’s theme was ‘cooking with alcohol’. The recipe below is from Jen at www.becomingpigzilla.com (what a cute name!!), originally from Food Network.

Apricot & Rum Dipping Sauce
Ingredients:
- 1/2 cup apricot preserves
- 2 tbsp dark rum
Instructions:
- Put both ingredients into a small sauce pan. Cook for 10 minutes over low heat, stirring occasionally.
- Serve
I cooked this down longer than the original recipe instructed as I wanted it to be a little thinner-more of a glaze consistency as you can see below. I heated up some spring rolls that I had in the freezer but you could put this on anything-grilled chicken, shrimp etc…

Check out the rest of the swap recipes here:


20 Jun 2013
by sparksfromthekitchen
in Appetizer, Side Dish
Tags: fries, sweet potato
Every once in a while I get a taste for fries. Since I’m not big on frying and since I like sweet potatoes more than regular ones I like to make these from time to time. They’re crunchy and oh so tasty and guilt free-no frying!! They couldn’t be simpler and you can make a trillion combos with them-different spices on them, different dipping sauces etc… I usually just make them with olive oil, kosher salt, white pepper and garlic powder. Simple and very yummy!
This time around, on a small plate, I put a small bit of each of the following to dip the fries in: ranch dressing, mayonnaise, dijon mustard, tomato ketchup, banana ketchup (brought home from St. Lucia in April and delicious) and some garlic chili sauce. I like dipping variety I guess. Each were tasty but the dijon and banana ketchup are my faves.

Baked Sweet Potato Fries
Ingredients:
- 1 small sweet potato, peeled and cut into even 1/4 inch sticks
- 1-1.5 tsp olive oil
- sprinkle of kosher salt
- sprinkle of white pepper
- sprinkle of garlic powder
Instructions:
- Pre-heat oven to 425F.
- Place potato sticks in a bowl and toss with olive oil and salt.
- Lay the fries on a baking sheet so that they are not touching and sprinkle the pepper and garlic powder over them evenly and to taste.
- Bake for 15 minutes turn them over and bake for another 15.
- Remove from oven and sprinkle with additional salt if desired.
- Serve immediately.
Helpful notes: the more uniformally you cut the sticks the more uniformally they will cook. Sometimes the fries cook faster than the last time. Moisture level maybe? Who knows. In any case keep an eye on them for the last 15 minutes to make sure they don’t burn. Don’t line the baking sheet with anything.
Previous Older Entries Next Newer Entries