Blueberry Lemon Curd Cake

I feel like I’ve had a crazy case of writers block lately. I have so many posts to write and my mind is just blank…..

Blueberries. Little spheres of yummy happiness. I’ve loved them all of my nearly 40 years on this planet. They’re so delicious and they’re healthy to boot. What’s not to love?

This recipe is on the healthier side of cake I guess you could say due to the yogurt-but don’t be fooled. It’s a deeeeelicious cake. It’s adapted from recipe I found digging through the endless offerings on the interwebs. I made changes that I think moved it along for the better. Also it’s big-it’s a 9×13 baking dish size which is great-everyone gets a piece.

image

Blueberry Lemon  Curd Cake

Ingredients:

  • 3 cups self-rising flour
  • 1/2 tsp baking soda
  • 1/2 cup extra virgin olive oil
  • 1/2 cup canola oil
  • 1&1/2 cups granulated sugar
  • 2 large eggs at room temperature
  • 1 cup plain greek yogurt at room temperature
  • 2 tbsp. lemon curd
  • 2 cups fresh blueberries

Instructions:

  1. Preheat oven to 425 and make sure the rack is in the middle.
  2. Spray a 9×13 glass baking dish with baking spray and set aside.
  3. In the bowl of a mixer fitted with the paddle attachment add the oil, eggs and sugar. Mix on medium until it’s smooth, scraping the sides as needed.
  4. Add the yogurt and lemon curd and continue to mix, scraping again, until smooth.
  5. In a separate bowl whisk the flour and baking soda together.
  6. Gently fold the flour into the wet ingredients.
  7. Add the berries and fold very gently until mixed in.
  8. Pour the batter evenly into the pan and spread it evenly with a spatula.
  9. Bake for 5 minutes then lower the heat to 350 and bake for 20-25 more minutes or until a toothpick inserted into the center comes out clean.
  10. Remove. Allow to cool and then cut and serve.
  11. Will keep for a few days in an airtight container.

image

This cake is this installation of What’s Baking!!! The theme for this time around is ‘baking with fresh fruit’.

image

Adapted from http://www.letthebakingbeginblog.com

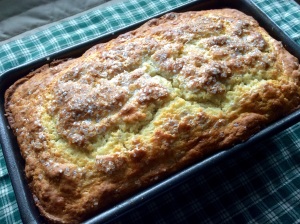
American Irish Soda Bread

My Irish ancestors, the McGinns, who lived in County Cork would no doubt hang me for even naming this bread like the soda bread that they used to make. It’s so not Irish Soda Bread-but American Soda Bread just sounds all wrong doesn’t it?

image

While they’d hang me, they’d probably cut me down the minute they tasted the bread–as it’s delicious. It’s not dry and crumbly like most. It’s more of a light cake or treat bread. It also doesn’t have raisins which is my doing-I hate them in breads.

Make it-it’s so easy and so so so yummy!

image

American Irish Soda Bread

Ingredients:

For bread:

  • 12.75 ozs self rising flour (I used King Arthur Brand)
  • 1/4 tsp baking soda
  • 4.25 ozs granulated sugar
  • 3/4 tbsp caraway seeds (or more or less per taste)
  • 1 large egg
  • 14ozs light buttermilk
  • 2 ozs unsalted butter, melted
  • feel free to add currants, dried cranberries or raisins.

For topping:

  • 1 tbsp milk
  • 2 tbsp sparkling sugar

Instructions:

  1. Preheat oven to 375f. Spray a 9×5 loaf pan with non-stick baking spray.
  2. In a large bowl add the flour, baking soda, sugar and seeds. Whisk to combine and break up any lumps.
  3. In another bowl add the egg and buttermilk and whisk until completely combined.
  4. Stir the wet ingredients into the dry, working quickly and gently. Do not overmix. Add the butter and continue to stir gently but thoroughly to incorporate all ingredients. The dough will first seem very wet from the butter but when you continue to stir it will come together beautifully.
  5. Pour the batter into the prepared pan. Smooth out and drag your finger around the inside of the pan to make a moat.
  6. Drizzle the milk over the top of the dough (the  moat will keep it from going down into the pan) and sprinkle the sugar evenly all over.
  7. Bake for 50-60 minutes.  When it’s done an instant read thermometer inserted into the center will read 200-210F. The top will be golden brown and a knife inserted will come out clean.
  8. Remove the bread from the oven, allow it to cool for 5 minutes then run a knife around the outside to loosen any suck areas. Turn out onto a wire rack to cool. Slice and serve.

Yield: 1 loaf. Adapted from King Arthur Flour’s recipe.

Note: I served this with whipped honey butter. Soften 1/2 stick of butter, put it in a mixing bowl, squirt honey in to taste and go to it with your electric mixer until fluffy and light.  Use as much or as little honey as you’d like. And let your dog taste it to make sure it’s perfect.

image


Roasted Chicken Stock-Stove Top

So after making this outstanding roast chicken I had put the carcass and gizzards in the freezer to make stock another time.  It worked so well-I just let them defrost on a baking sheet for about an hour.

This stock is delicious. It’s got that deep chicken flavor that amazing chicken soups have-so many layers of tasty.  Roasting the carcass and gizzards makes a huge difference in the end product. It really brings out the great flavors in what’s left on the bones. Don’t skip that step. This photo really shows the deep color well.

image

Roasted Chicken Stock

Ingredients:

  • Carcass, gizzards, and neck from one 5-6lb roast chicken
  • Olive oil
  • Kosher Salt
  • Freshly ground black pepper
  • Pat of butter
  • 1 large yellow onion, chopped large
  • 2 celery stalks cut into 1/2 inch lengths
  • 1 large carrot cut into 1/2 inch rounds
  • 2 cups low sodium, fat free chicken broth
  • 9-11 cups water
  • 2 cloves garlic cut into a few pieces
  • 1 bay leaf
  • 1 glurg of apple cider vinegar

Instructions:

  1. Preheat oven to 425
  2. Place carcass and chicken pieces on a roasting pan lined with foil. Drizzle with olive oil and sprinkle with salt and pepper.
  3. Roast for 30 minutes.
  4. While chicken is roasting sautee the onion, celery and carrot slowly to brown them in a large dutch oven. When they’re brown but still very firm add the broth and scrape up the brown bits with a wooden spoon.
  5. Add the garlic and all of the chicken pieces to the vegetables. Pour water over all until it covers the chicken completely plus a bit more. Add the bay leaf and cider vinegar. Bring to a boil then reduce to a simmer.
  6. Cook for 3 hours, skimming any foam that appears and adding water as needed to cover the chicken.
  7. Discard the carcass and pour through a strainer into a large bowl to remove any pieces. Press the vegetables to remove all of the liquid. Discard carcass and left over vegetable pieces.
  8. Allow to cool then place the bowl in the fridge overnight. In the morning skim off the fat that has collected on the top. It’s very easy to use a fine screen spider for this.
  9. Pour, through the same spider, into jars or bags for freezing.

This recipe makes 1 28oz jar and 1 quart sized zip lock bag.

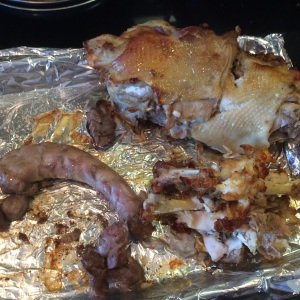
This is the roasted carcass and bits. Those extra roasted pieces make a big difference in flavor!

image

Perfect Roast Chicken

Winter is one of those times of year when I love to have something cooking for a while that fills the house with an amazing cozy aroma. Chili, stew, soups-they all fit the bill. So does a fabulous roasting chicken.  I’ll let you in on a little secret. I have a serious mental aversion to touching cooked chicken on the bone-except for buffalo wings for some reason-so if I roast a chicken husband has to be home to help me out.  I don’t think he minds 😉 he gets to pick off as many bits as he likes. But I digress. I do not have an aversion to touching raw chicken. So……

Anyway, here’s the recipe for what really is the Perfect Roast Chicken. Crisp skin. Juicy meat. Look at that beauty!

image

Perfect Roast Chicken

Ingredients:

  • 1 roasting chicken (5-6lbs)
  • Kosher salt
  • Freshly ground black pepper
  • 1 large bunch fresh thyme
  • 1 large lemon, cut in half
  • 1 head garlic, cut in half horizontally
  • 2-3 tbsp butter, melted
  • 1 large yellow onion, sliced thick
  • 4 carrots cut into 2 inch chunks
  • Olive oil

Instructions:

  1. Preheat oven to 425f.
  2. Remove the giblets, neck etc.. and put aside.  Rinse the chicken inside and out with cold water. Pat dry with paper towels. Check out your chicken for any feathers, large pieces of fat etc.. and remove.
  3. Liberally salt and pepper the inside of the chicken. Really load it up. Then put the thyme, lemon and garlic inside.
  4. Brush the butter all over the chicken. Liberally salt and pepper the outside then tie the legs together with kitchen string and tuck the wings under the body.
  5. Toss the veggies with olive oil and spread around the bottom of the pan.  Rest your chicken right on top of them.
  6. Roast for 40 minutes then reduce heat to 350 and cook until an instant read thermometer stuck into the thickest part reads 165. It will be about 90 minutes.
  7. Place the chicken and veggies on a tray and let them rest, covered with foil, for 15 minutes. Carve and serve.

You’ll want to keep the giblets, neck and carcass for stock. Just throw them all in a ziplock and put them in the freezer. Here is the recipe for the stock!! It’s delicious!

image

Recipe adapted from Ina Garten.

Baby Back Ribs

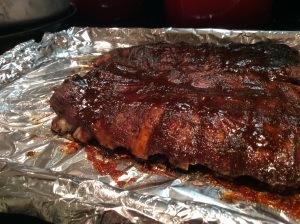
Years and years ago I asked Husband’s Aunt for her recipe for ribs. She made them for us once and they were so so delicious! Just a bit spicy, a bit sweet, full of flavor and they couldn’t be easier to make. I made them to eat while we watched the Super Bowl. The game and the advertisements were totally underwhelming. The ribs were not!

You could probably use spare ribs with this but I prefer baby backs.

image

Baby Back Ribs

Ingredients:

  • 1 rack baby back ribs
  • 1/4 tsp chili powder
  • 1/4 tsp ancho chili powder
  • 1 heaping tsp ground cumin
  • 1 tsp paprika
  • 1 tsp dry oregano
  • 1 tsp sugar
  • kosher salt and freshly ground black pepper for sesaoning
  • 3 tbsp vegetable oil
  • Favorite bbq sauce

Instructions:

  1. Preheat the oven to 300f.
  2. Line a baking sheet with heavy duty foil
  3. Remove the membrane from the bony underside of the rack. I find it easy to start with a paring knife then just separate it with my hands.
  4. Season with salt and pepper on both sides.
  5. Starting with the chili powder and ending with the oregano mix the ingredients together and set aside.
  6. Brush or rub the oil onto both sides of the ribs. Rub the spices and herb mix onto both sides of the ribs.
  7. Cook on the prepared baking sheet, meaty side up, until very tender for about 2 hours and 30 minutes then brush all over with your favorite bbq sauce.  Cook for another 10 minutes.
  8. Remove from the oven and cut between the ribs and serve with extra bbq sauce.

image


image

Focaccia Blitz Bread

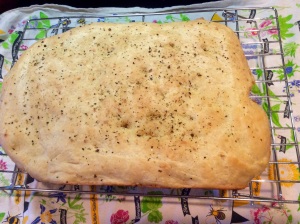
The February ‘What’s Baking’ theme is bread! I’m so glad-it’s something that I’ve really struggled with over the years. Since I gave my bread machine away I’ve been really concentrating on my technique rather than relying on a machine. I’ve been able to bake it pretty successfully and am gaining confidence each time it comes out of the oven warm, yummy and smelling divine.

image

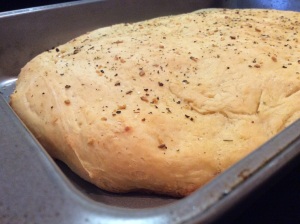
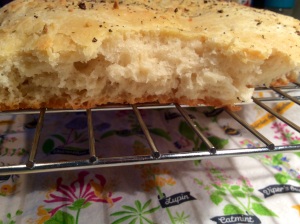
This focaccia is really tasty. It’s light, full of beautiful holes and the flavor is really lovely. I cut some slices half-wise horizontally and made panini, I toasted and put jam for breakfast (Trader Joe’s reduced sugar strawberry is delicious on it) and ate it with just a slice of cheddar cheese and granny smith apple. Either way-it’s a winner.

image

Blitz Bread: Focaccia

Ingredients:

  • 2 tbsp olive oil (to drizzle into pan)
  • 1&1/2 cups warm water (110f degrees)
  • 3 tbsp olive oil (for the dough)
  • 1&1/4 tsp kosher salt
  • 3&1/2 cups King Arthur AP Flour
  • 1 tbsp Instant Yeast (I used SAF)
  • dried herbs for sprinkling on top

Instructions:

  1. Lightly grease a 9×13 pan and drizzle the 2 tbsp olive oil into it and swirl to coat. Set aside.
  2. Combine all ingredients and beat on high using an electric mixer for 60 seconds.
  3. Scoop the batter (it’s sticky) into the pan, cover with a damp tea towel and let it rise in a warm area at room temperature for an hour until it becomes puffy.
  4. When the dough is almost risen for the hour preheat the oven to 375.
  5. Gently poke the dough with your fingertip.
  6. Drizzle it with the remaining oil, sprinkle with dried herbs and bake until its golden brown-25 to 30 minutes.
  7. Remove it from the oven, allow it to rest for 5 minutes then turn it out onto a cooling rack.
  8. Eat some right away with olive oil and fresh herbs.

Adapted from King Arthur Flour

image

image

Pepperoni Roll-Ups

I hosted Christmas Eve again this year and, for dinner, served this Bolognese with some fun pasta and a gorgeous green salad. For appetizers I kept it simple-some hummus, crackers, cheese, olives etc… I wanted to serve something warm also though.  These pepperoni roll-ups fit the bill perfectly. Super easy to make and even more delicious! I followed the recipe but I think next time I will halve everything and make double the amount at half of the size.

I think you could probably make these ahead of time and leave them in the fridge until you’re ready to bake them.

image

Pepperoni Roll-Ups

 Ingredients:

  • 1 8oz tube of refrigerated crescent rolls
  • 16 slices of quarter-sized pepperoni, cut into quarters
  • 2 pieces of 1oz mozzarella string cheese (2ozs total) cut into quarters
  • 1 tsp Italian seasoning (or oregano, garlic salt and onion powder)
  • 1/2-1 cup pizza sauce for dipping

Instructions:

  1. Preheat oven to 375. Place a sheet of parchment paper on a rimmed baking tray.
  2. Unroll the dough and separate it into the 8 outlined triangles. On each piece place 8 quarters of pepperoni then place the piece of cheese on the small corner and roll it up starting with the short side. Pinch the seam across the dough to seal. Sprinkle with the Italian seasoning.
  3. Place them 2 inches apart on the prepared baking tray and bake for 10-12 minutes. Watch them carefully.
  4. Warm the pizza sauce while they’re baking.
  5. Remove them from the oven and let them sit for 2-3 minutes then serve immediately with the warmed pizza sauce for dipping.

image


Adapted from Taste of Home.


Ruby Red Grapefruit, Meyer Lemon and Olive Oil Cake

I was so glad to see the Meyer lemons back in the store a few weeks ago. I bought a few of them with the intent of finding something to bake/cook/mix. The season is so short and I didn’t want to wait.

Coincidentally, the next day, I spotted a gorgeous cake on Cheese Curd in Paradise. A grapefruit and olive oil cake.  I saw it and thought “well why not? Grapefruit and Meyer lemons are delicious together! ” I also had a grapefruit in my fridge to use up. So the recipe below was hatched. It’s a lovely lightly flavored, moist cake that is very easy to make. No mixer needed-just a few bowls and a spoon.

Any left over glaze is perfect for dipping strawberries into also!

image

Ruby Red Grapefruit, Meyer Lemon and Olive Oil Cake

Ingredients (Cake):

  • Non-stick baking spray
  • 1 & 1/2 cups AP flour
  • 2 tbsp ruby red grapefruit zest
  • 1 tbsp Meyer lemon zest
  • 1 cup granulated sugar
  • 1/2 cup very good quality olive oil
  • 2 large eggs, at room temperature
  • 1 tsp baking powder
  • 1/4 tsp baking soda
  • 2 tsp table salt
  • 1 tbsp ruby red grapefruit juice (freshly squeezed)
  • 1 tbsp Meyer lemon juice (freshly squeezed)
  • 1/3 cup plain non-fat Greek yogurt

Syrup

  • 2 tbsp granulated sugar
  • 1/3 cup ruby red grapefruit juice (freshly squeezed)

Glaze

  • 1 cup confectioners sugar
  • 1 tbsp ruby red grapefruit juice (freshly squeezed)
  • 1 tbsp Meyer lemon juice (freshly squeezed)

Instructions:

  1. Pre-heat the oven to 350 and prepare a 9×5 inch loaf pan.
  2. Place the sugar and zest in a large bowl and smush it through your fingers until it gets slightly pasty.
  3. To the sugar mixture add the oil, whisk to combine, then the eggs-one at a time, stir until evenly combined scraping the sides of the bowl as needed.
  4. In a smaller bowl combine the flour, baking powder, baking soda and salt. Whisk to evenly combine.
  5. In a small bowl mix the juices and yogurt and whisk until evenly combined.
  6. Add the flour and buttermilk mixtures to the sugar mixture-alternating but beginning and ending with the flour. Stirring to combine in between each addition. Do not over mix.
  7. Pour the batter into the prepared pan and smooth it out on the top. Give the pan a few light taps on the counter to get out any air bubbles.
  8. Bake for 40-45 minutes or until a toothpick inserted into the middle comes out clean.
  9. While the cake is baking make the syrup. Place the ingredients into a small sauce pan, cook over medium heat until the sugar dissolves. Stir it from time to time. Set it aside.
  10. When the cake is done let it cool in the pan for 10 minutes. While the cake is cooling place a cooling rack over a large piece of parchment paper or foil. Place the cooling rack on the top of the cake and carefully turn it upside down to release the cake from the pan onto the rack. Place it over the foil or parchment and, using a skewer, poke holes about 2 inches into the cake. Slowly pour the syrup evenly over the top of the cake. Leave the cake to cool completely.
  11. Make the glaze by combining all of the ingredients above in a small bowl and whisk to combine and form a smooth even mixture. Drizzle the glaze over the cake slowly and evenly. Let it set and serve.

image

Adapted from Smitten Kitchen via Cheese Curd in Paradise.

Gingerbread Cookies

I’m not sure why but I’d never made gingerbread before. The recipes always scared me a bit. Maybe it was the molasses. I do love it though–such a not-sweet cookie and so ‘holiday’.

I was so glad (and somewhat terrified) when the What’s Baking group theme was revealed-GINGERBREAD!

And you know what? I was afraid for no reason. They were so easy to make! Such a small ingredient list, a simple procedure.  I’ll admit the first batch that I cut into man shapes ended up looking like aliens-but I figured out that it was because I rolled the dough too thin and it got warm.  You need to keep your dough COLD. Really really cold. And keep it rolled to no thinner than 1/4 inch.

While the recipe stated to roll half of the dough at a time, I found using only 1/4 was much easier for me to keep the temperature right.

So have fun!! Fear not!!

I didn’t get to decorate my gingerbread cookies. Since I was serving them as part of the dessert for my Christmas Eve get together I decided to let everyone decorate their own-how fun it was!  Since I’m not the best with decorating cookies it saved me some crooked-decorating humiliation too.

image

Gingerbread Cookies

Ingredients:

  • 3/4 cup unsalted butter
  • 3/4 cup brown sugar, packed
  • 3/4 cup molasses (regular/original)
  • 1 tsp salt
  • 2 tsp ground cinnamon
  • 2 tsp ground ginger
  • 1/4 tsp allspice
  • 1 large egg
  • 1 tsp baking powder
  • 1/4 tsp baking soda
  • 3 & 1/2 cups unbleached AP flour (I used King Arthur brand)

image

Instructions:

  1. Melt the butter in a small sauce pan set over medium heat. Stir in the brown sugar, molasses, salt and spices.
  2. Pour the butter mixture into a large mixing bowl and set it aside to let it cool to lukewarm. Then beat in the egg.
  3. Whisk the baking powder and baking soda into the flour. Add the flour mixture to the butter mixture.
  4. Stir until completely combined. Don’t over-mix.
  5. Divide the dough into 4 even pieces and wrap each tightly in plastic wrap. Cool them in the refrigerator for at least an hour-but up to one day.
  6. Preheat the oven to 350. Line several baking sheets with parchment paper.
  7. When the dough has chilled sufficiently roll it to 1/4 inch thickness using parchment paper on the bottom and plastic wrap on top.
  8. Cut out shapes with cookie cutters and carefully transfer the shape to the prepared baking sheet. Reroll and cut the scraps or add to the batch in the fridge.
  9. Bake for 8-12 minutes or until firm. Mine took exactly 9 minutes as I like them a bit chewy.
  10. Let the cookies cool on the baking sheet for a minute or 2 then carefully (I use my fish spatula for this) transfer them to cooling racks.
  11. Repeat with the remaining dough.
  12. Once cooled completely you can decorate them. The cookies will keep for at least a week in an airtight container un-decorated.

I used moose, owl, snowflake and the typical gingerbread man cookie cutters. They came out great!!

image image


Here’s the ‘make your own’ set up. Some sprinkles, some frosting pens….

image


Adapted from King Arthur Flour’s recipe.

image

Baked Rigatoni with Sausage

It’s time again for the recipe swaps!! This time around it’s ‘Blogger’s Choice’ meaning you’re assigned a blog and choose a recipe that sounds great to you.

I was given Kate’s blog and found quite a few that I’d like to make but ultimately picked this one. It sounded great for fall, easy to make and nice for a weekend dinner in.  It was a huge hit with everyone who tasted it.  I lightened up the recipe a bit by using chicken sausage and part skim mozzarella.

I don’t know who thought to put the garlic bread on top of the pasta under the cheese but I’d like to meet them and give them a hug. What  a SUPER idea!!

image

Baked Rigatoni with Sausage

 Ingredients: 

  • 1.5 lbs. sweet Italian chicken sausage
  • 8 oz rigatoni, dry, then cooked al dente
  • 4 tbsp olive oil plus 1 tsp separated
  • 1/4 cup onion, chopped small
  • 1-2 cloves garlic
  • 1 26oz can marinara sauce (I used Trader Giotto’s) or use homemade
  • 1 tbsp fresh basil chopped, plus 8 whole fresh leaves
  • 1/2 cup freshly grated Parmesan cheese, plus 3 tbsp
  • 1/4 tsp freshly ground black pepper
  • 1 10 oz frozen garlic bread loaf, defrosted
  • 3 cups part-skim mozzarella cheese, grated
  • 2 Roma tomatoes, cut into 8 even slices.

Instructions:

  1. Cook the sausage and slice into thin coins. Set aside.
  2. Heat a large sauce pan over medium-high heat. Add the 1 tsp olive oil. When hot add the onion and cook for a few minutes to soften. Add the garlic and cook for another minute.  Reduce heat to low and add the marinara sauce.  Let it heat, stirring occasionally, for a few minutes to incorporate the flavors.
  3. Grease a 9×13 baking dish.
  4. Preheat oven to 400F.
  5. In a large mixing bowl combine the cooked sausage, cooked pasta, sauce, 1 tbsp basil, pepper and the 1/2 cup Parmesan. Stir it gently to evenly coat everything.
  6. Gently pour the mixture into the prepared dish.
  7. Make 6 even slices through the garlic bread (resulting in 12 halves top/bottom slices). Using the non-ends line 4 pieces over one half of the pasta and the other 4 pieces over the other half to have 2 rows.  Sprinkle the remaining 3 tbsp of Parmesan over the bread. Sprinkle the mozzarella evenly over the bread and exposed areas of pasta.
  8. Place the 4 tbsp of olive oil in a shallow dish. Gently dip each tomato slice in and coat it with the oil. Shake off the excess and place one tomato slice on top of each piece of bread.
  9. Bake, uncovered, for about 15-25 minutes until cheese is melty and bubbly.  It only took about 15 minutes for me.
  10. Remove the pan and gently tip up one of the tomato slices and slide one of the remaining full basil leaves underneath it. Repeat with each tomato.
  11. Allow the dish to set for about 10 minutes.
  12. Slice and serve.

Note: I sprinkled some more grated Parmesan on the 4 end pieces of the bread, wrapped them in foil and heated them in the oven with the pasta.

Makes 8-10 servings.

Adapted from http://www.katerecipebox.com/2011/09/26/baked-ziti-with-sausage/


image

Previous Older Entries